


Introduction:
Python for loop is a fundamental construct in Python that allows developers to iterate over sequences, making it a powerful tool for handling repetitive tasks. Whether you’re a beginner or an experienced programmer, understanding the ins and outs of the Python for loop is essential for writing efficient and readable code. In this article, we’ll delve into the intricacies of the for loop, exploring its syntax, use cases, and advanced features.
For Loop Basic Syntax
Let’s start with the basics. The python for loop is versatile and can iterate over various data structures, including lists, tuples, strings, and more. We’ll cover the basic syntax, demonstrating how to create a simple loop and iterate through a sequence of elements.
for item in sequence:
    # Code block to be executed for each iteration
    # Access 'item' to perform operations
Iterating Over Lists and Tuples:
Learn how to harness the power of for loops to iterate over lists and tuples. Understand the role of the loop variable and how it represents each item in the sequence. Dive into practical examples to solidify your understanding and discover best practices for loop usage.
# Iterating over a List
fruits = ["apple", "orange", "banana", "grape"]

print("Iterating over a list:")
for fruit in fruits:
    print(fruit)

# Iterating over a Tuple
colors = ("red", "green", "blue", "yellow")

print("\nIterating over a tuple:")
for color in colors:
    print(color)
In this example, we have a list named fruits and a tuple named colors. The for loop is used to iterate over each element in these sequences, and the loop variable (fruit and color in this case) takes on each value in the respective sequence during each iteration. The loop body, indicated by the indentation, then executes the code within for each element.
The output of the code will be:
Iterating over a list:
apple
orange
banana
grape

Iterating over a tuple:
red
green
blue
yellow
This demonstrates the basic syntax and functionality of a for loop when iterating over both lists and tuples in Python.
String Manipulation with For Loops:
Explore how for loops can be used for efficient string manipulation. Iterate through characters in a string, reverse a string, or extract specific substrings. Uncover tricks and techniques to make your string processing code concise and readable.
Let’s take an example where we iterate over each character in a string and print the characters in reverse order:
# String Manipulation with For Loop
original_string = "Python"

print("Original String:", original_string)

# Iterate over the string characters in reverse order
reversed_string = ""
for char in reversed(original_string):
    reversed_string += char

print("Reversed String:", reversed_string)
In this example, we start with the string “Python.” The for loop iterates over each character in reverse order using reversed(original_string). During each iteration, the loop variable char takes on the value of each character, and we concatenate them to build the reversed string (reversed_string).
The output of the code will be:
Original String: Python
Reversed String: nohtyP
This demonstrates how a for loop can be used for string manipulation, in this case, reversing the characters of a string. You can modify the loop body to perform various string operations based on your specific requirements.
Enumerate Function:
The enumerate function is a game-changer when it comes to python for loops. Learn how to use it to simultaneously access both the index and value of each item in a sequence. This can greatly enhance the readability and efficiency of your code.
for index, value in enumerate(sequence):
    # Code block to be executed for each iteration
    # Access 'index' and 'value' to perform operations
Nested For Loops:
Master the art of nesting for loops to iterate over multidimensional data structures, such as lists of lists. Understand the indentation structure and learn how to efficiently navigate and manipulate nested sequences.
Nested for loops are used when you need to iterate over multiple dimensions or levels of data. Here’s an example of nested for loops to create a multiplication table:
# Nested For Loop Example: Multiplication Table
for i in range(1, 6):  # Outer loop for the rows
    for j in range(1, 11):  # Inner loop for the columns
        product = i * j
        print(f"{i} * {j} = {product}", end="\t")
    print()  # Move to the next line after completing inner loop for each row
In this example, we have two for loops. The outer loop (for i in range(1, 6)) iterates over the numbers 1 to 5, representing the rows of our multiplication table. The inner loop (for j in range(1, 11)) iterates over the numbers 1 to 10, representing the columns.
During each iteration of the inner loop, we calculate the product (i * j) and print the multiplication table entry. The end="\t" parameter in the print function is used to separate the entries by a tab space, creating a neat table format.
The output of the code will be a multiplication table from 1 to 5:
1 * 1 = 1    1 * 2 = 2   1 * 3 = 3   1 * 4 = 4   1 * 5 = 5   1 * 6 = 6   1 * 7 = 7   1 * 8 = 8   1 * 9 = 9   1 * 10 = 10
2 * 1 = 2    2 * 2 = 4   2 * 3 = 6   2 * 4 = 8   2 * 5 = 10  2 * 6 = 12  2 * 7 = 14  2 * 8 = 16  2 * 9 = 18  2 * 10 = 20
3 * 1 = 3    3 * 2 = 6   3 * 3 = 9   3 * 4 = 12  3 * 5 = 15  3 * 6 = 18  3 * 7 = 21  3 * 8 = 24  3 * 9 = 27  3 * 10 = 30
4 * 1 = 4    4 * 2 = 8   4 * 3 = 12  4 * 4 = 16  4 * 5 = 20  4 * 6 = 24  4 * 7 = 28  4 * 8 = 32  4 * 9 = 36  4 * 10 = 40
5 * 1 = 5    5 * 2 = 10  5 * 3 = 15  5 * 4 = 20  5 * 5 = 25  5 * 6 = 30  5 * 7 = 35  5 * 8 = 40  5 * 9 = 45  5 * 10 = 50
This example illustrates how nested for loops can be used to generate a table or grid structure.
List Comprehensions:
List comprehensions are a concise and expressive way to create lists in Python. They provide a more compact syntax compared to traditional for loops when you want to generate a list based on an existing iterable. Here’s an example of list comprehension to create a list of squares of numbers from 0 to 9:
# List Comprehension Example: Squares of Numbers
squares = [x**2 for x in range(10)]

print("List of Squares:", squares)
In this example, the list comprehension [x**2 for x in range(10)] is used to create a list named squares. The expression x**2 calculates the square of each number in the range from 0 to 9 (generated by range(10)), and the resulting list contains the squares of these numbers.
The output of the code will be:
List of Squares: [0, 1, 4, 9, 16, 25, 36, 49, 64, 81]List comprehensions can also include conditions. Here’s an example of using a condition to create a list of even squares:
# List Comprehension Example: Even Squares
even_squares = [x**2 for x in range(10) if x % 2 == 0]

print("List of Even Squares:", even_squares)
In this case, the condition if x % 2 == 0 filters out only the even numbers from the range before calculating their squares.
The output of the code will be:
List of Even Squares: [0, 4, 16, 36, 64]List comprehensions are a powerful and Pythonic way to generate lists efficiently, especially for simple transformations and filtering operations.
Advanced Techniques:
Delve into advanced techniques such as using the zip function to iterate over multiple sequences simultaneously. Explore ways to break out of loops prematurely using the break statement and handle the next iteration with the continue statement.
Conclusion:
The Python for loop is a versatile and powerful tool that plays a crucial role in writing efficient and readable code. By mastering its syntax and exploring advanced features, you’ll be better equipped to tackle a wide range of programming challenges. Use this comprehensive guide to elevate your understanding of the Python for loop and take your coding skills to the next level
while loop python
In Python, the while loop is a fundamental control flow structure that allows you to repeatedly execute a block of code as long as a specified condition is true. This loop provides flexibility and power in handling situations where you want to repeat a certain task until a particular condition is met. In this article, we will explore the while loop in Python, understand its syntax, and delve into practical examples to solidify your understanding.
Syntax of the ‘while’ Loop:
The basic syntax of a while loop in Python is as follows:
while condition:
    # Code to be executed while the condition is true
    # ...
    # Update the condition to eventually exit the loop
The loop continues to execute the code block as long as the specified condition evaluates to True. It’s crucial to include a mechanism within the loop to alter the condition, ensuring that the loop eventually terminates to avoid an infinite loop.
Example 1: Counting with a ‘while’ Loop
Let’s start with a simple example that demonstrates how to use a while loop to count numbers:
# Count from 1 to 5 using a while loop
counter = 1

while counter <= 5:
    print(counter)
    counter += 1
In this example, the loop starts with counter set to 1. The loop iterates as long as the condition counter <= 5 is true, printing the value of counter in each iteration. The counter += 1 statement ensures that the loop progresses towards its termination.
Example 2: User Input Validation
A common application of the while loop is in user input validation. Consider the following example where the user is prompted to enter a positive integer:
# User input validation using a while loop
user_input = -1

while user_input <= 0:
    user_input = int(input("Enter a positive integer: "))

print(f"You entered: {user_input}")
This loop continues to prompt the user for input until a positive integer is provided. The int(input(...)) combination is used to take user input as an integer, and the loop ensures that the entered value is positive.
Example 3: Handling Unknown Input
The while loop is also handy when dealing with situations where the number of iterations is not known beforehand. Consider a scenario where you want to calculate the sum of numbers entered by the user until a specific condition is met:
# Calculating the sum of numbers until a condition is met
total = 0

while True:
    number = int(input("Enter a number (enter 0 to stop): "))

    if number == 0:
        break  # Exit the loop if the user enters 0

    total += number

print(f"The sum of entered numbers is: {total}")
In this example, the loop runs indefinitely (while True), and the user is prompted to enter numbers. The loop breaks if the user enters 0, and the total sum of entered numbers is then displayed.
Conclusion
The while loop is a powerful tool in Python, allowing you to create flexible and dynamic programs. By understanding its syntax and applying it to various scenarios, you can harness the full potential of this loop structure. Remember to include mechanisms within the loop to alter the condition, ensuring controlled and effective program execution. With these skills, you can confidently use the while loop to tackle a wide range of programming challenges in Python.
while loop python project: Magic tiles 3 Continuous Autoclicker Coding Tutorial!
Introduction
Dominate with a magic tiles 3 autoclicker! In this tutorial, we will walk through the process of creating an continuous autoclicker for the game Magic Tiles 3 which will implement the skills we just learnt about python for loops! The goal is to loop the automation of the clicking process to achieve high scores effortlessly.
Purpose of the Tutorial
The primary objective of this tutorial is to guide you through the process of developing a Python script that automates the clicking process in Magic Tiles 3. By the end of this tutorial, you’ll have a basic understanding of how to capture the game screen, identify clickable tiles, and implement an autoclicker whilst all within a python for loop.
Why Automate Magic Tiles 3?
Magic Tiles is a rhythm-based game that challenges players to tap on the correct tiles in sync with the music. While the game is engaging, it can also be repetitive. Looping through an auto-clicker allows you to focus on strategy and scoring, relieving you from the repetitive task of manual clicking.
But most importantly, these are transferrrable skills for doing RPA (Robotic Automation Processing)!
Step 1: Set Up the Environment
Before diving into the coding process, it’s crucial to set up your development environment. This step ensures that you have the necessary tools and libraries installed to begin creating the Magic Tiles autoclicker.
1.1 Install Python and Code Editor
If you don’t have Python installed on your system, download and install it from the official Python website. Additionally, choose a code editor of your preference; popular choices include Visual Studio Code, PyCharm, or Jupyter Notebooks. Need a guide on installling Python and Pycharm? Click here: Install Pycharm and Python: Clone a github project
The github source to clone this project is located here: https://github.com/slyautomation/magic-tiles-autoclicker
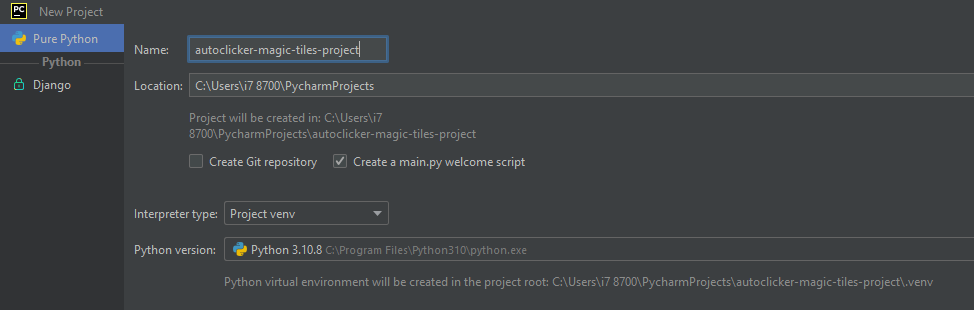
1.2 Create a New Project and Python Script
Open your code editor and create a new project and also a new Python script for your magic tiles 3 autoclicker project. Save the script with a meaningful name, such as magic_tiles_auto_clicker.py.

1.3 Install Required Libraries
In this tutorial, we’ll be using the pyautogui library for controlling mouse clicks in magic tiles 3. Open your terminal or command prompt and install the library using the following command:
# Install required library
pip install pyautogui keyboard pillow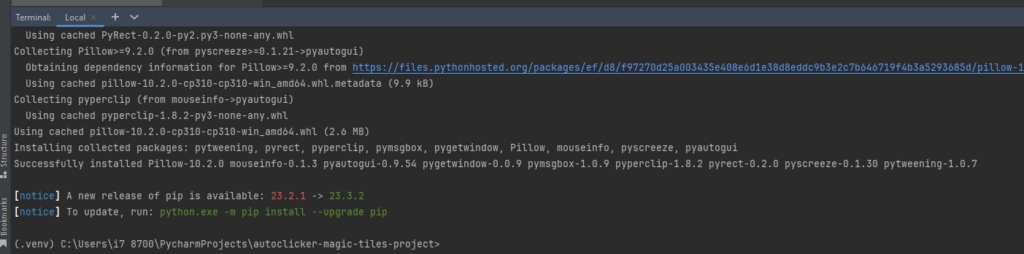
1.4 Import Necessary Libraries
In your Python script, start by importing the necessary libraries. This includes pyautogui for mouse control and time for introducing delays in your magic tiles 3 script:
# Import necessary libraries
import keyboard
import pyautogui
import time
from PIL import ImageGrab
These libraries will be instrumental in automating the clicking process in the Magic Tiles 3 game.
Setting up the variables to find where to click
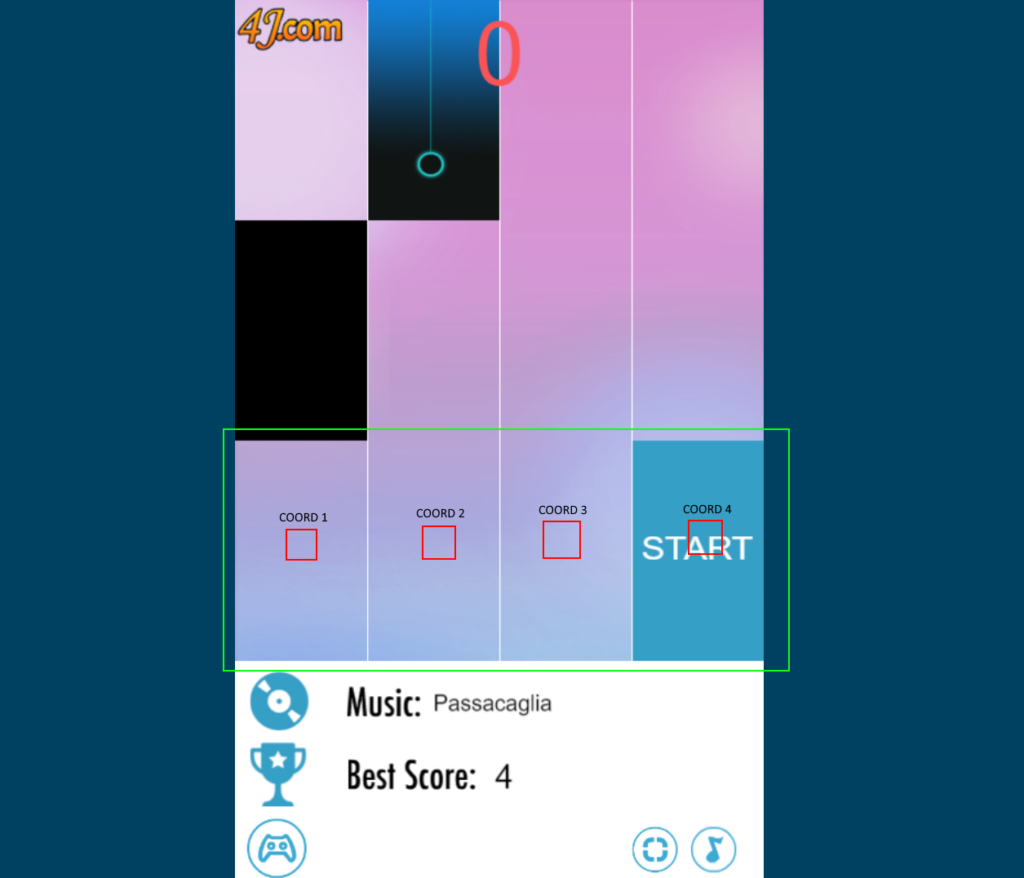
As seen in the above image there’s an area where we need to identify when a tile hits the end of the screen the game will end as the tile was not pressed in time!
The 4 red squares represent the coordinates that we need in order to determine what tiles and the order to score points in the game. We can get these coordinates using the following function:
def print_mouse_position():
    try:
        while True:
            x, y = pyautogui.position()
            print(f"Mouse Position - X: {x}, Y: {y}")
    except KeyboardInterrupt:
        print("\nMouse position printing terminated by user.")
Here, we define a function named print_mouse_position. Inside the function:
- A
tryblock is used to catch exceptions. - Within the
while Trueloop, thepyautogui.position()function retrieves the current mouse coordinates (X, Y). - The coordinates are then printed to the console using
print. - The loop continues indefinitely, continuously printing the mouse position.
using the code slyautomation was able to get all 4 coordinates
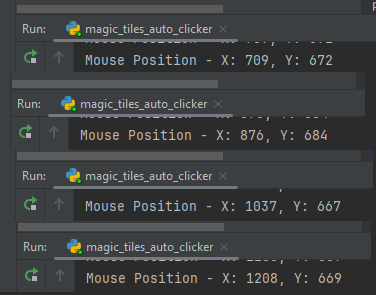
Placing these into an arrau and setting pyautogui.PAUSE = 0 to ensure no delays in the execution of handling mouse clicks and movement.
coord = [(709, 672), (876, 684), (1037, 667), (1208, 669)]
pyautogui.PAUSE = 0
Step 2: Capture Game Screen
To interact with the game, we need to capture the game screen. Run the following code to take a screenshot.
# Take a screenshot and return image object
def take_screenshot():
    #im = ImageGrab.grab(bbox=[640, 70, 1280, 1080])  # left , top , right, bottom
    im = ImageGrab.grab()
    return im
Step 3: Identify Clickable Tiles
In this step, we’ll examine the screenshot to identify the clickable tiles. it takes the x and y position. We’ll later return the coordinates to click in the autoclicker segment of the code!
def click(x,y):
    pyautogui.click(x, y)
Step 4: Implement the Auto Clicker
Now, let’s create a function to continuously find and click the identified tiles in a python for loop.
def run_autoclicker():
    while True:
        screenshot = pyautogui.screenshot()
        color = screenshot.getpixel((coord[0][0], coord[0][1]))
        if color[0] == 0:
            print("COORD 1:", color)
            click(coord[0][0], coord[0][1])
        color = screenshot.getpixel((coord[1][0], coord[1][1]))
        if color[0] == 0:
            print("COORD 2:", color)
            click(coord[1][0], coord[1][1])
        color = screenshot.getpixel((coord[2][0], coord[2][1]))
        if color[0] == 0:
            print("COORD 3:", color)
            click(coord[2][0], coord[2][1])
        color = screenshot.getpixel((coord[3][0], coord[3][1]))
        if color[0] == 0:
            print("COORD 4:", color)
            click(coord[3][0], coord[3][1])

# Run the auto clicker
run_autoclicker()
Step 5: Implement a Fail-Safe
To prevent unexpected behavior, add a fail-safe mechanism to stop the auto clicker if needed.
def run_autoclicker():
    print("Autoclicker Ready!!!")
    autoclick = True
    while autoclick:
        if keyboard.is_pressed('num lock'):
            print("Autoclicker Off!!!")
            autoclick = False
            exit()
        screenshot = take_screenshot()
        color = screenshot.getpixel((coord[0][0], coord[0][1]))
        if color[0] < 20:
            print("COORD 1:", color)
            click(coord[0][0], coord[0][1])
        color = screenshot.getpixel((coord[1][0], coord[1][1]))
        if color[0] < 20:
            print("COORD 2:", color)
            click(coord[1][0], coord[1][1])
        color = screenshot.getpixel((coord[2][0], coord[2][1]))
        if color[0] < 20:
            print("COORD 3:", color)
            click(coord[2][0], coord[2][1])
        color = screenshot.getpixel((coord[3][0], coord[3][1]))
        if color[0] < 20:
            print("COORD 4:", color)
            click(coord[3][0], coord[3][1])


# Run with toggle off autoclicker
run_autoclicker()
This code defines a simple auto-clicker script in Python that can be toggled on and off using the ‘Num Lock’ key. Let’s break down how it works:
Run_autoclicker Features
autoclick = True: This line initializes a variableautoclickand sets its initial value toTrue. This variable serves as a flag to control the execution of the auto-clicking loop.while autoclick:: This initiates a while loop that continues as long as theautoclickvariable isTrue. In other words, the loop will keep running untilautoclickis set toFalse.if keyboard.is_pressed('num lock'):: Inside the loop, there is anifstatement that checks if the ‘Num Lock’ key is pressed. The functionkeyboard.is_pressed()is used to detect key presses. This function is not explicitly imported in the provided code, so you would need to import it from thekeyboardmodule.- If the ‘Num Lock’ key is pressed, the following actions are performed:
print("Autoclicker Off!!!"): This prints a message to the console indicating that the auto-clicker is turned off.autoclick = False: This sets theautoclickvariable toFalse, which will exit the while loop since the loop condition (while autoclick:) will no longer be true.exit(): This function is used to terminate the entire Python script. The program will exit after printing the message, effectively stopping the auto-clicker.
In summary, this script creates a loop that continuously checks if the ‘Num Lock’ key is pressed. If the key is detected, it prints a message, sets the autoclick variable to False, and exits the script. This provides a simple way to turn off the autoclicker using the ‘Num Lock’ key.
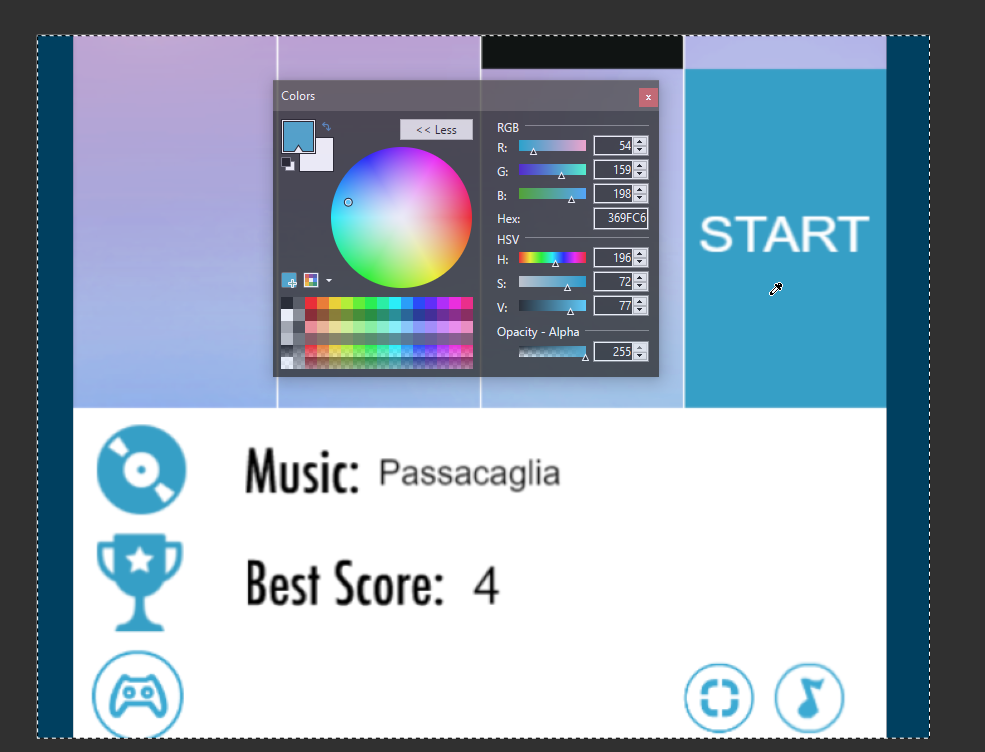
But if you were to run this it will click on tiles not in order to be clicked or even start the game. So Let’s make another function to start the game for us! You can get the start color tile using the paint program and using the color dropper tool and the color pallette we can determine the rgb value (54, 159, 198)
def start_game():
    screenshot = take_screenshot()
    color = screenshot.getpixel((coord[0][0], 750))
    if color == (54, 159, 198):
        print("COORD 1:", color)
        click(coord[0][0], 750)
    color = screenshot.getpixel((coord[1][0], 750))
    if color == (54, 159, 198):
        print("COORD 2:", color)
        click(coord[1][0], 750)
    color = screenshot.getpixel((coord[2][0], 750))
    if color == (54, 159, 198):
        print("COORD 3:", color)
        click(coord[2][0], 750)
    color = screenshot.getpixel((coord[3][0], 750))
    if color == (54, 159, 198):
        print("COORD 4:", color)
        click(coord[3][0], 750)
print("Game Started!!!")run_autoclicker():
This version of the auto-clicker follows a traditional approach. It continuously checks the pixel color at specific coordinates, and if the color indicates a black tile (the condition color[0] < 20 checks if the red component is less than 20), it clicks on the corresponding tile. The game is interrupted when the ‘Num Lock’ key is pressed.
But a problem arises when the order of checking each lane doesn’t correspond to the next tile. And cannoted be resolved with the code above because we need to check which tile is the closest to the bottom indicating that tile should be prioritised.
To resolve this we use the following function to determine what tile needs to be prioritised:
def find_max_value_and_index(arr):
    if not arr:
        print("Array is empty.")
        return None, None

    max_value = max(arr)
    max_index = arr.index(max_value)

    return max_index, max_value
We’ll use this to determine later what is the maximum value and the index of the coordinate. Here is the updated code implementing the function above!
def run_autoclicker_v2():
    print("Autoclicker Ready!!!")
    autoclick = True
    while autoclick:
        if keyboard.is_pressed('num lock'):
            print("Autoclicker Off!!!")
            autoclick = False
            exit()
        screenshot = take_screenshot()
        for y in range(screenshot.height - 1, 99, -1):
            ready = False
            current_tile = [0, 0, 0, 0]
            color = screenshot.getpixel((coord[0][0], y))
            if color[0] < 20:
                print("COORD 1:", color)
                current_tile[0] = y
                ready = True
            color = screenshot.getpixel((coord[1][0], y))
            if color[0] < 20:
                print("COORD 2:", color)
                current_tile[1] = y
                ready = True
            color = screenshot.getpixel((coord[2][0], y))
            if color[0] < 20:
                print("COORD 3:", color)
                current_tile[2] = y
                ready = True
            color = screenshot.getpixel((coord[3][0], y))
            if color[0] < 20:
                print("COORD 4:", color)
                current_tile[3] = y
                ready = True
            x, y = find_max_value_and_index(current_tile)
            if ready:
                click(coord[x][0], y)
                #time.sleep(0.01)
breakrun_autoclicker_v2():
The second version (run_autoclicker_v2()) represents an improvement over the first one. Instead of checking pixel colors from a single point. Its checking a vertical line from the bottom of the screen upwards.
- It iterates through the y-coordinates from the bottom of the screen to a specified limit (99 in this case).
- For each y-coordinate, it checks the color of the pixels at the specified x-coordinates of the tiles.
- If a black tile is detected, it stores the y-coordinate in the
current_tilelist. - After scanning all tiles for a given y-coordinate, it uses the
find_max_value_and_index()function to find the index of the maximum value in thecurrent_tilelist. This index represents the tile that should be clicked. - If a black tile is found, it clicks on the corresponding tile and then breaks out of the loop.
Advantages of run_autoclicker_v2() over run_autoclicker():
- Efficiency:
run_autoclicker_v2()increases the number of pixel checks maximising the potential to detect a black tile. - Overcoming prioritisation: The find_max_value_and_index resolves the issue we had before because regardless of where the y position is checked, each lane is being compared at the same time meaning if a black tile is lower than the other lanes it’s clicked first!
Overall, run_autoclicker_v2() is an improved version that performs more efficiently and is more adaptable to tile prioritisation.
🎉🚀 Witness the Astonishing High Score Achieved by This Incredible Bot! 🚀🎉

Magic Tiles Autoclicker Code
import keyboard
import pyautogui
import time
from PIL import ImageGrab


def take_screenshot():
    #im = ImageGrab.grab(bbox=[640, 70, 1280, 1080])  # left , top , right, bottom
    im = ImageGrab.grab()
    return im

def print_mouse_position():
    try:
        while True:
            x, y = pyautogui.position()
            print(f"Mouse Position - X: {x}, Y: {y}")
    except KeyboardInterrupt:
        print("\nMouse position printing terminated by user.")


coord = [(709, 815), (876, 815), (1037, 815), (1208, 815)]
pyautogui.PAUSE = 0

def click(x,y):
    pyautogui.click(x, y)
    #time.sleep(0.1)

def start_game():
    screenshot = take_screenshot()
    color = screenshot.getpixel((coord[0][0], 750))
    if color == (54, 159, 198):
        print("COORD 1:", color)
        click(coord[0][0], 750)
    color = screenshot.getpixel((coord[1][0], 750))
    if color == (54, 159, 198):
        print("COORD 2:", color)
        click(coord[1][0], 750)
    color = screenshot.getpixel((coord[2][0], 750))
    if color == (54, 159, 198):
        print("COORD 3:", color)
        click(coord[2][0], 750)
    color = screenshot.getpixel((coord[3][0], 750))
    if color == (54, 159, 198):
        print("COORD 4:", color)
        click(coord[3][0], 750)
    print("Game Started!!!")

def run_autoclicker():
    print("Autoclicker Ready!!!")
    autoclick = True
    while autoclick:
        if keyboard.is_pressed('num lock'):
            print("Autoclicker Off!!!")
            autoclick = False
            exit()
        screenshot = take_screenshot()
        color = screenshot.getpixel((coord[0][0], coord[0][1]))
        if color[0] < 20:
            print("COORD 1:", color)
            click(coord[0][0], coord[0][1])
        color = screenshot.getpixel((coord[1][0], coord[1][1]))
        if color[0] < 20:
            print("COORD 2:", color)
            click(coord[1][0], coord[1][1])
        color = screenshot.getpixel((coord[2][0], coord[2][1]))
        if color[0] < 20:
            print("COORD 3:", color)
            click(coord[2][0], coord[2][1])
        color = screenshot.getpixel((coord[3][0], coord[3][1]))
        if color[0] < 20:
            print("COORD 4:", color)
            click(coord[3][0], coord[3][1])


def find_max_value_and_index(arr):
    if not arr:
        print("Array is empty.")
        return None, None

    max_value = max(arr)
    max_index = arr.index(max_value)

    return max_index, max_value

def run_autoclicker_v2():
    print("Autoclicker Ready!!!")
    autoclick = True
    while autoclick:
        if keyboard.is_pressed('num lock'):
            print("Autoclicker Off!!!")
            autoclick = False
            exit()
        screenshot = take_screenshot()
        for y in range(screenshot.height - 1, 99, -1):
            ready = False
            current_tile = [0, 0, 0, 0]
            color = screenshot.getpixel((coord[0][0], y))
            if color[0] < 20:
                print("COORD 1:", color)
                current_tile[0] = y
                ready = True
            color = screenshot.getpixel((coord[1][0], y))
            if color[0] < 20:
                print("COORD 2:", color)
                current_tile[1] = y
                ready = True
            color = screenshot.getpixel((coord[2][0], y))
            if color[0] < 20:
                print("COORD 3:", color)
                current_tile[2] = y
                ready = True
            color = screenshot.getpixel((coord[3][0], y))
            if color[0] < 20:
                print("COORD 4:", color)
                current_tile[3] = y
                ready = True
            x, y = find_max_value_and_index(current_tile)
            if ready:
                click(coord[x][0], y)
                #time.sleep(0.01)
                break
start_game()
run_autoclicker_v2()

#print_mouse_position()
Piano Tiles Code
Another magic tiles clone we can do the same steps but the starting of the game will be different, we’ll need to use opencv for its template matching ability:
Install opencv using the following command in the terminal:
pip install opencv-python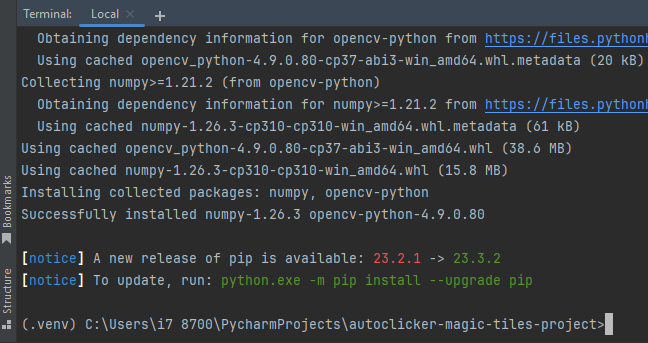
Slyautomation takes a image of the start button to use in the template matching function!

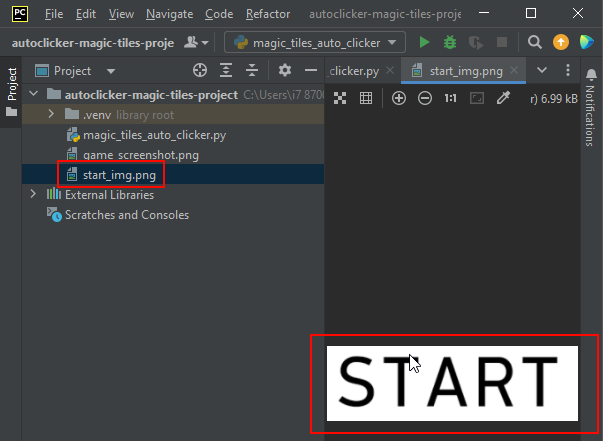
Nice, lets do the code!
def start_game_gamesgame():
    im = ImageGrab.grab()
    im.save('screenshot.jpg')
    import cv2

    # Load the images
    haystack_img = cv2.imread('screenshot.jpg')
    needle_img = cv2.imread('start_img.png')

    # Perform template matching
    result = cv2.matchTemplate(haystack_img, needle_img, cv2.TM_CCOEFF_NORMED)

    # Get best match location
    min_val, max_val, min_loc, max_loc = cv2.minMaxLoc(result)

    # Draw a rectangle around the matched region
    threshold = 0.9  # Adjust this value based on your use case
    if max_val >= threshold:
        needle_h, needle_w = needle_img.shape[:2]
        location = (max_loc[0] + needle_w, max_loc[1] + needle_h)
        cv2.rectangle(haystack_img, max_loc, location, (0, 255, 0), 2)
        pyautogui.click(max_loc[0] + round(needle_w/2), max_loc[1] + round(needle_h/2))

    # Output the final result
    cv2.imwrite('output_image.jpg', haystack_img)
Adjust the take screenshot to accomodate the black background border:
def take_screenshot():
    im = ImageGrab.grab(bbox=[660, 100, 1250, 1050])  # left , top , right, bottom
    #im = ImageGrab.grab()
    return im
new coords as well for each lane:
coord = [(65, 815), (225, 815), (380, 815), (540, 815)] # gamesgames versionAlso need to offset the mouseclicks due to the image grab cropped screenshots:
def click(x,y):
    x_offset = 660
    y_offset = 99
    pyautogui.click(x + x_offset, y + y_offset)
    #time.sleep(0.1)
Conclusion
You’ve now created a basic autoclicker for Magic Tiles using Python. Feel free to adjust parameters like pixel color for other tile clickers or even to fine-tune the performance. Be cautious when using auto-clickers and ensure they comply with the game’s terms of service to avoid any issues. Happy Coding!
Need another autoclicker project? Check out here: Auto Clickers for Roblox: Build your own Auto Clicker for Roblox


Informative articles, excellent work site admin! If you’d like more information about Airport Transfer, drop by my site at QH6 Cheers to creating useful content on the web!