


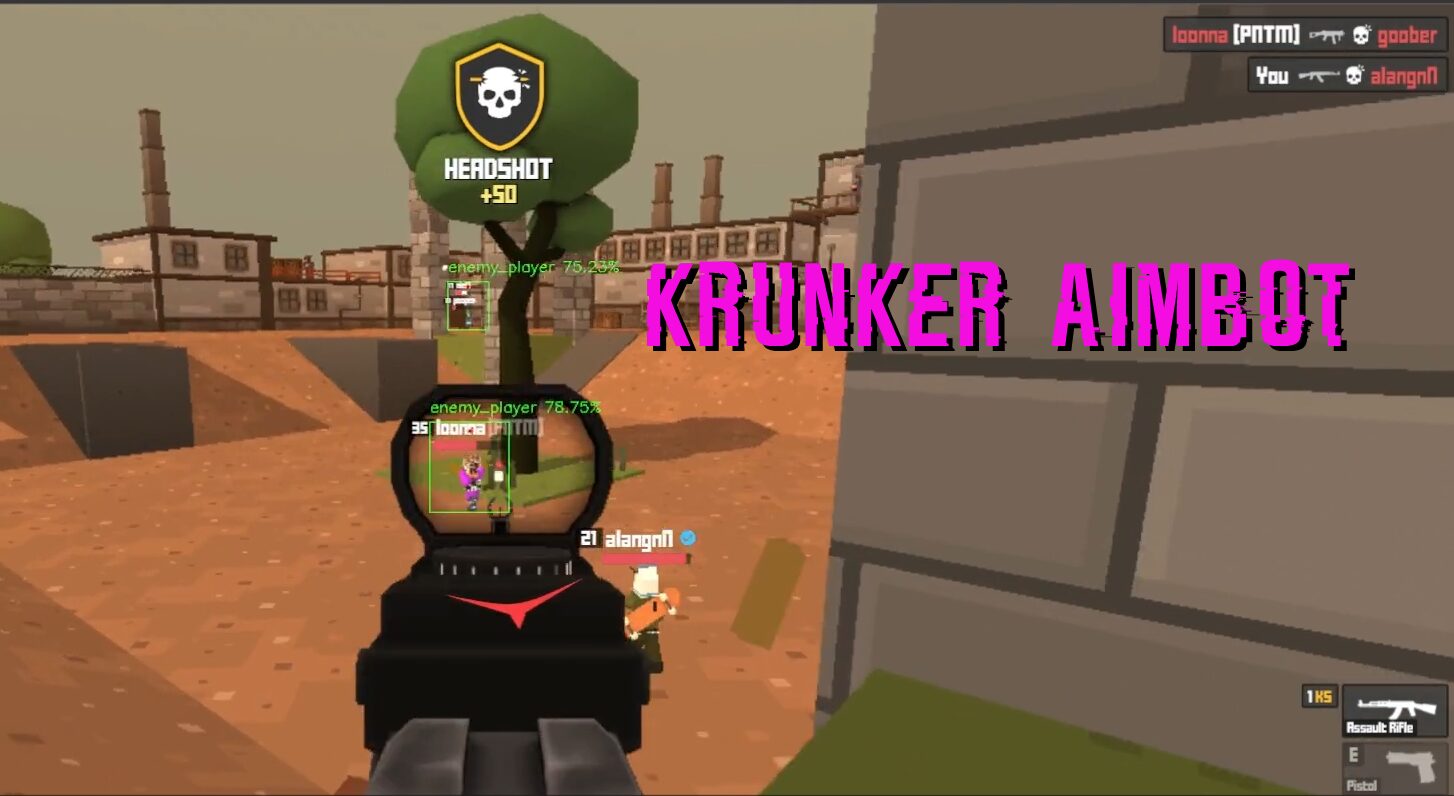
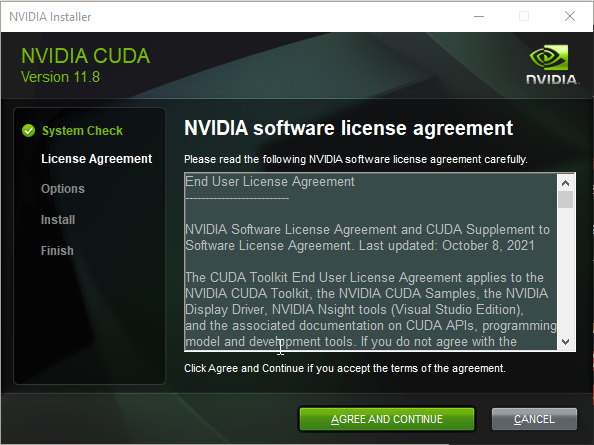
Krunker Aimbot Introduction
Welcome, fellow computer vision enthusiasts! My name is slyautomation, and I’m excited to take you through this comprehensive tutorial on training an Krunker Aimbot using YOLOv8, the cutting-edge object detection algorithm developed by Ultralytics.
Object detection is a critical task in computer vision, enabling machines to identify and locate objects within images or videos. In a game like Krunker.io, this technology can be used to build an aimbot! Short for “You Only Look Once” (version 8), is renowned for its speed and accuracy, making it ideal for real-time applications such as aimbotting.
In this guide, I’ll walk you through everything you need to know, from setting up your environment and collecting data to training your model and deploying the aimbot.
For the code and project files, you can find the complete source on GitHub: YOLOv8 Aimbot Repository.
Table of Contents
- Why YOLOv8?
- Step 1: Setting Up Your Krunker Aimbot Development Environment
- 1.1 Installations (CUDA & cuDNN, Python dependencies)
- 1.2 Setting Up PyCharm and Cloning the GitHub Repository
- Step 2: Data Collection
- 2.1 Selecting or Gathering Your Own Dataset
- 2.2 Preparing Game Object Images
- Step 3: Training the YOLOv8 Aimbot
- 3.1 Configuring Your Krunker Aimbot Dataset for YOLOv8
- 3.2 Training the Krunker Aimbot Model with Your Data
- Step 4: Running Your Krunker Aimbot
- 4.1 Loading Pretrained Krunker Aimbot Models (Apex, PUBG, Fortnite)
- 4.2 Testing Your Aimbot in Action
- Conclusion and Next Steps
Why YOLOv8?
YOLOv8 is the latest and most powerful version of the YOLO series, offering both state-of-the-art performance and remarkable efficiency. YOLOv8 is ideal for applications that require real-time object detection, thanks to its ability to process images quickly and accurately. This makes it an excellent choice for an aimbot system, where fast and precise object recognition is essential for success in fast-paced games.
YOLOv8 is highly versatile, being used in various domains like surveillance, autonomous vehicles, wildlife monitoring, and gaming. Its flexibility and performance have made it a favorite among researchers and developers alike, and it’s particularly relevant for our gaming aimbot project in 2024.
Step 1: Setting Up Your Development Environment
1.1 Installing CUDA and cuDNN
To maximize the performance of YOLOv8, you’ll need to harness the power of your GPU. This involves installing CUDA and cuDNN, two essential libraries from Nvidia that accelerate deep learning computations.
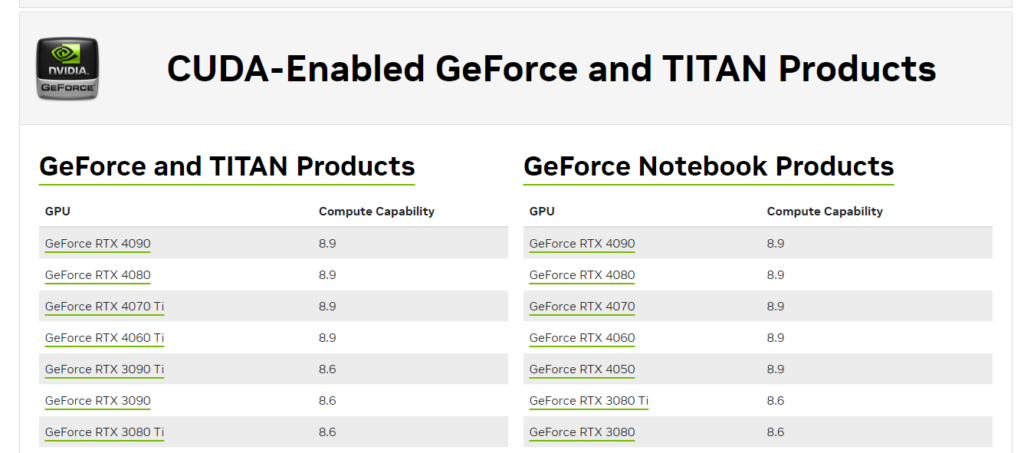
Check GPU Compatibility
The first step is to ensure your GPU is compatible with the CUDA version you’ll be installing. Visit the Nvidia CUDA GPUs page to check the compatibility of your GPU.
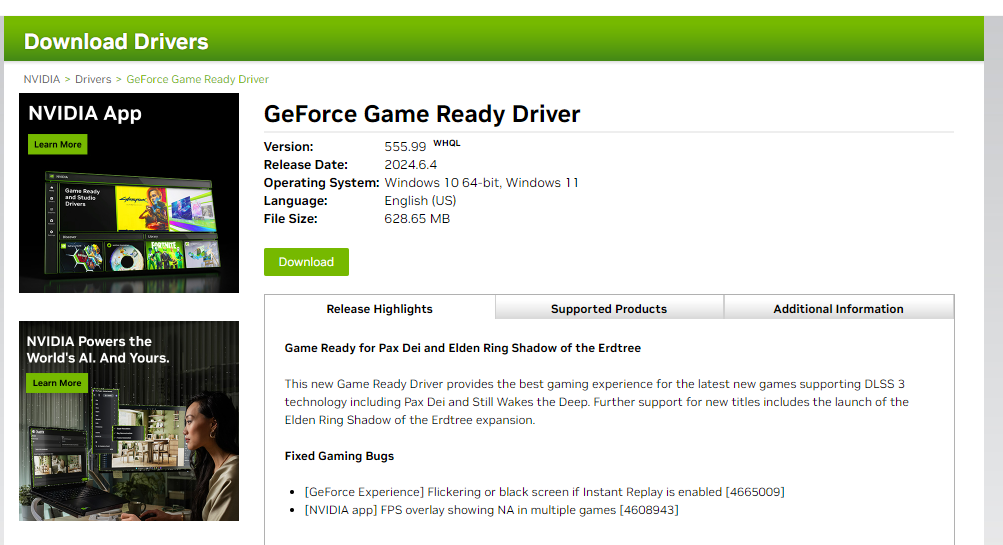
Install Nvidia GPU Drivers
Next, you’ll need to install the latest Nvidia drivers for your GPU. Visit the Nvidia Driver Download page, enter your GPU details, and download the appropriate driver.
- Select your GPU model and operating system.
- Download and install the driver following the on-screen prompts.
- Restart your computer after installation.
Install CUDA Toolkit (Version 11.8 Recommended)
Now, it’s time to install the CUDA Toolkit, which provides the libraries needed for GPU acceleration.
- Download the CUDA Toolkit 11.8 from the Nvidia CUDA Toolkit Archive.
- Follow the installation instructions provided on the Nvidia website. Make sure to use the standard installation options.
- Once installation is complete, verify it by running the following command in your terminal:
nvcc --versionThis should display the installed version of CUDA.

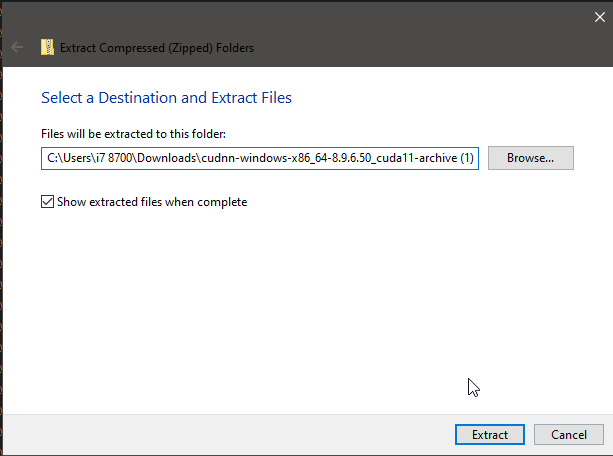
Install cuDNN (Version Compatible with CUDA 11.X)
The next step is to install cuDNN, which provides highly optimized implementations of neural network operations.
- Download the cuDNN library for CUDA 11.X from the Nvidia cuDNN Archive.

- Extract the contents of the downloaded ZIP file.
- Navigate to your CUDA Toolkit installation directory (typically
C:\Program Files\NVIDIA GPU Computing Toolkit\CUDA\v11.8). - Copy the extracted cuDNN files into the corresponding directories in the CUDA folder:
binincludelib
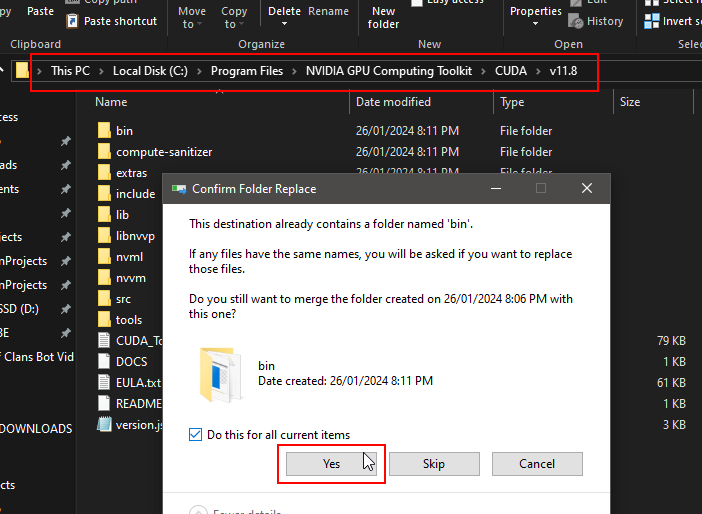
Once everything is in place, your system should be ready to use GPU acceleration for deep learning tasks.
1.2 Installing Python Dependencies and Setting Up PyCharm
Now that you have CUDA and cuDNN installed, it’s time to set up your Python environment.
- Install PyCharm, a popular IDE for Python development, from JetBrains.
- Clone the YOLOv8 Aimbot repository from GitHub:
git clone https://github.com/slyautomation/yolov8.git- Open the project in PyCharm.
Install the necessary Python packages:
pip install -r requirements.txtThis will install key dependencies like torch and ultralytics.
Install or Update PyTorch and Related Packages
To ensure that YOLOv8 is fully compatible with CUDA and cuDNN, you need to install or update the required PyTorch libraries. Use the following command to install PyTorch, TorchVision, and Torchaudio with CUDA 11.8 support:
pip install --upgrade --force-reinstall torch torchvision torchaudio --index-url https://download.pytorch.org/whl/cu118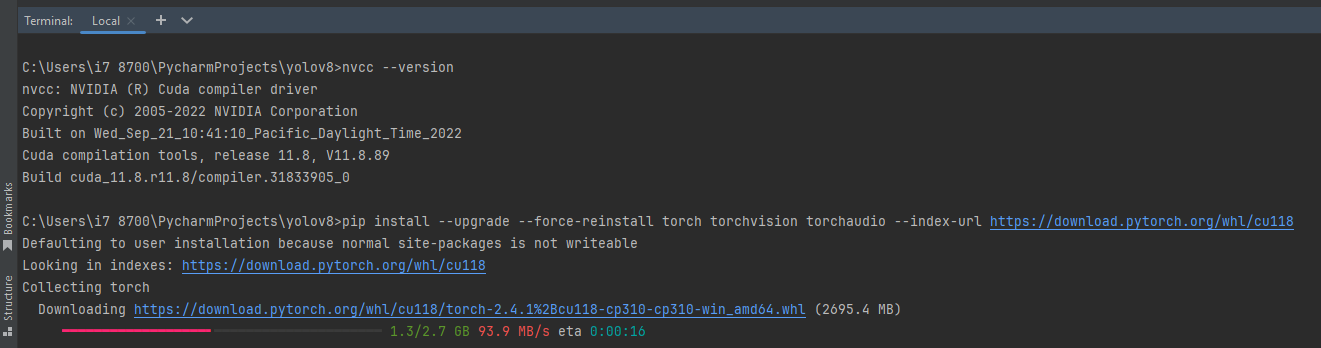
This command forces the installation of the latest versions of PyTorch, TorchVision, and Torchaudio with CUDA 11.8 compatibility. It ensures that your setup is optimized for GPU-accelerated deep learning.
Once the installation is complete, verify that PyTorch can detect your GPU by creating a new file called test_gpu.py and running:
import torch
import ultralytics
def run_checks():
    ultralytics.checks()
    print("Using GPU:", torch.cuda.is_available())
    #display.clear_output()

run_checks()
This should return True if your GPU setup is working correctly.
Step 2: Data Collection
2.1 Selecting or Gathering Your Own Dataset for Krunker Aimbot
To train an effective aimbot, you’ll need a dataset of in-game objects. There are two approaches you can take:
- Use an Existing Krunker Aimbot Dataset: Platforms like Roboflow provide access to numerous object detection datasets. Search for relevant datasets, such as krunker or Krunker.io. Here’s a list of krunker datasets ready to go!
Steps to Download and Prepare the Dataset:
- Find the Dataset: Visit Roboflow and search for the above Krunker datasets or any other relevant dataset. Use the above links!
- Download the Dataset: Once you’ve selected a dataset, click the Download Dataset button.
- Choose YOLOv8 Format: In the download options, select the YOLOv8 format to ensure compatibility with your project.
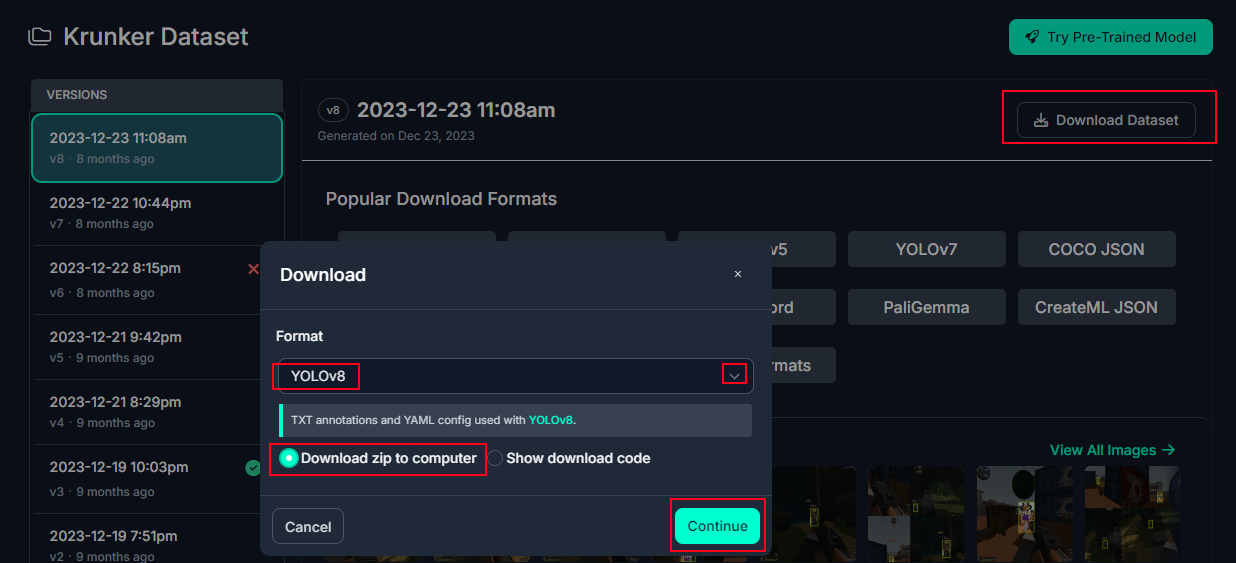
By following these steps, you’ll have your Krunker dataset ready to use for training or testing your aimbot with YOLOv8.
- (ignore if using pre existing dataset!) Create Your Own Krunker Aimbot Dataset: Capture screenshots or videos from your gameplay and manually label objects like enemies, weapons, or points of interest. You can use labeling tools like LabelImg or Roboflow’s built-in annotation tools.

2.2 Preparing Krunker.io Game Object Images (ignore if using pre existing dataset!)
Once you’ve gathered your Krunker Aimbot images, ensure they are pre-processed for training:
- Resize the images to a consistent resolution (e.g., 640×640).
- Convert all images to a uniform format (e.g.,
.jpgor.png). - Use annotation software to create bounding boxes around the objects of interest.
Your labeled dataset should be formatted in a way that YOLOv8 understands. Typically, YOLOv8 expects annotations in .txt format, where each line represents an object with the format:
<class_id> <x_center> <y_center> <width> <height>With the roboflow annotation app, these actions will be automatically done!

Step 3: Training the Krunker Aimbot
3.1 Configuring Your Krunker Aimbot Dataset for YOLOv8
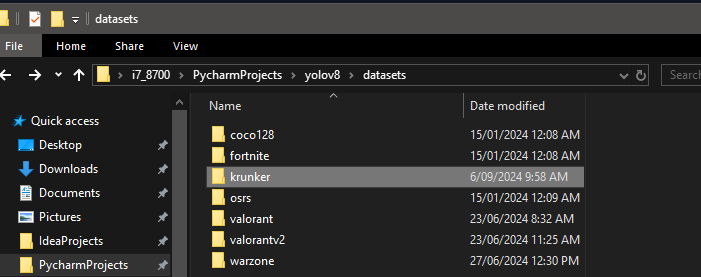
- Extract the Files: After downloading, extract the
.zipfile to your computer. - Move to YOLOv8 Directory: Place the extracted dataset into your
datasetsfolder within your YOLOv8 repository.- Make sure to rename the folder to krunker and move the data.yaml file back into the parent folder ‘yolov8’ and rename to krunker.yaml

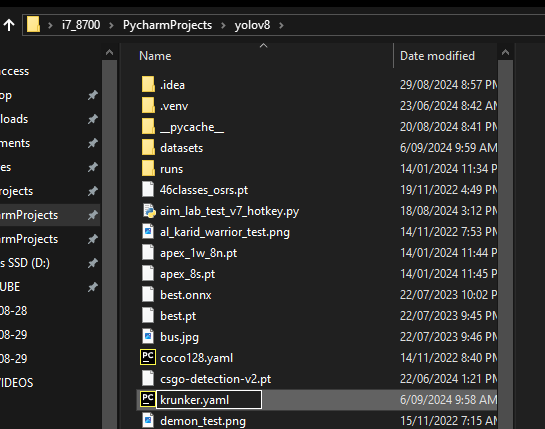
- Update the yaml file: update the yaml file to be compatible with this project by changing the path values to the following:
train: ../krunker/train/images
val: ../krunker/valid/images
test: ../krunker/test/images
Ensure that your training and validation data are correctly split and that the labels are in the correct format.
3.2 Training the Krunker Aimbot Model
To train the Krunker Aimbot model, use the train.py:
import torch
import ultralytics
from ultralytics import YOLO
def custom_train(load='pre', traindata="warzone.yaml", epoch=50, batc=3, export=False, val=False):
    # build a new model from scratch
    # load a pretrained model (recommended for training) yolov8n, yolov8s, yolov8m, yolov8l, yolov8x
    # Load a model
    if load == 'new':
        model = YOLO('yolov8n.yaml')  # build a new model from YAML
    if load == 'pre':
        model = YOLO('yolov8n.pt')  # load a pretrained model (recommended for training)
    if load == 'tran':
        model = YOLO('yolov8n.yaml').load('yolov8n.pt')  # build from YAML and transfer weights

    # Use the model
    model.train(data=traindata, epochs=epoch, batch=batc)  # train the model
    metrics = model.val()  # evaluate model performance on the validation set
    if val:
        print(metrics)
    if export:
        path = model.export(format="onnx")  # export the model to ONNX format
def run_checks():
    ultralytics.checks()
    print("Using GPU:", torch.cuda.is_available())
    #display.clear_output()

if __name__ == '__main__':
    run_checks()
    custom_train(traindata="krunker.yaml")
This python file trains a YOLOv8 Krunker Aimbot model on your Krunker Aimbot dataset for 50 epochs at a batch size of 3.

Monitor the training progress through the logs. After training is complete, evaluate the performance by checking metrics like precision, recall, and mAP.

Thid chart displays several metrics that provide insights into your YOLOv8 model’s training and validation performance. Here’s what each graph represents:
1. train/box_loss & val/box_loss
- Box Loss: This measures how well the predicted bounding boxes align with the ground truth boxes.
- Train: The box loss during training.
- Val: The box loss during validation.
- Interpretation: You can observe that the loss for my model decreases steadily over the epochs, which is a good sign that my model is learning and improving its predictions. A lower box loss indicates that the model is getting better at locating objects accurately.
2. train/cls_loss & val/cls_loss
- Classification Loss: This measures how well the model is classifying the objects in the bounding boxes.
- Train: Classification loss during training.
- Val: Classification loss during validation.
- Interpretation: Similarly to the box loss, the classification loss decreases over time, indicating that the model is improving its ability to correctly classify the objects.
3. train/dfl_loss & val/dfl_loss
- DFL (Distribution Focal Loss): This is related to the quality of bounding box regression, enhancing the localization precision.
- Train: DFL loss during training.
- Val: DFL loss during validation.
- Interpretation: The decrease in DFL loss over time shows that the model is refining its predictions for object locations within bounding boxes, leading to more accurate localization.
4. metrics/precision(B)
- Precision: This measures the percentage of positive detections that are actually correct (true positives / (true positives + false positives)).
- Interpretation: The precision curve shows how well the model is avoiding false positives. You can see that the precision improves over time and stabilizes, meaning the model is becoming more reliable at detecting true objects without incorrectly predicting too many false positives.
5. metrics/recall(B)
- Recall: This measures the percentage of actual objects that are correctly detected (true positives / (true positives + false negatives)).
- Interpretation: The recall increases over the epochs, indicating that the model is becoming better at detecting all objects, reducing the number of missed detections.
6. metrics/mAP50(B)
- mAP@0.5: This is the mean average precision at an Intersection over Union (IoU) threshold of 0.5. It essentially measures how well the model’s predicted bounding boxes overlap with the ground truth boxes.
- Interpretation: The mAP50 metric rises quickly and then levels off, indicating that the model is achieving good overlap with ground truth objects in the images.
7. metrics/mAP50-95(B)
- mAP@0.5-0.95: This is the mean average precision calculated over multiple IoU thresholds (from 0.5 to 0.95, in steps of 0.05). This is a stricter evaluation compared to mAP50 and reflects overall detection quality more robustly.
- Interpretation: This metric also increases steadily, showing that my model’s performance is improving even under more stringent conditions. However, it typically stabilizes at a lower value than mAP50 since it accounts for more difficult cases.
Overall Interpretation:
- Training and Validation Losses: Both the box, classification, and DFL losses are decreasing, showing that your model is learning effectively.
- Precision and Recall: These metrics stabilize at high values, which means my model is both detecting objects correctly and not missing many objects.
- mAP Scores: The mAP scores indicate that my model is performing well, particularly at IoU 0.5. The mAP@0.5-0.95 also looks solid, showing good generalization.
These results suggest my model is progressing well, with consistent improvement across key metrics. If i or you wanted to further fine-tune the model, adjusting the learning rate (increase epoch and/or increase batch number in the training command) or increasing the dataset size will continue to improve the performance of the krunker aimbot model.
Step 4: Running Your Krunker Aimbot
4.1 Loading the Krunker Aimbot Models
best.pt is typically the filename used to store the best-performing model weights during training in the YOLOv8 (and other YOLO versions) framework. Here’s what it means:
What is best.pt?
- Model Weights:
best.ptcontains the trained weights of your model, which represent the learned parameters (such as layer weights and biases) that have been optimized during training. - Best Performing: During training, the model’s performance is evaluated on the validation dataset at the end of each epoch. The training process saves the model that achieves the best performance according to a particular metric (commonly the mAP@0.5-0.95).
- Automatic Saving: YOLO automatically saves
best.ptwhenever a model performs better than any previous epoch on the evaluation criteria (usually the highest validation mAP score).
How is best.pt Used?
- Inference: You can load the
best.ptmodel for inference, allowing you to use the model’s weights to make predictions on new, unseen data. - Further Training: You can use the
best.ptfile as a checkpoint to resume training or fine-tune the model from where it performed best, rather than starting from scratch. - Evaluation: You can load the
best.ptmodel to evaluate it on a test dataset and calculate performance metrics like precision, recall, mAP, etc.
Loading the best.pt Model
In summary, best.pt represents the optimal version of your model based on the validation performance throughout training, and it is commonly used for inference or further fine-tuning.
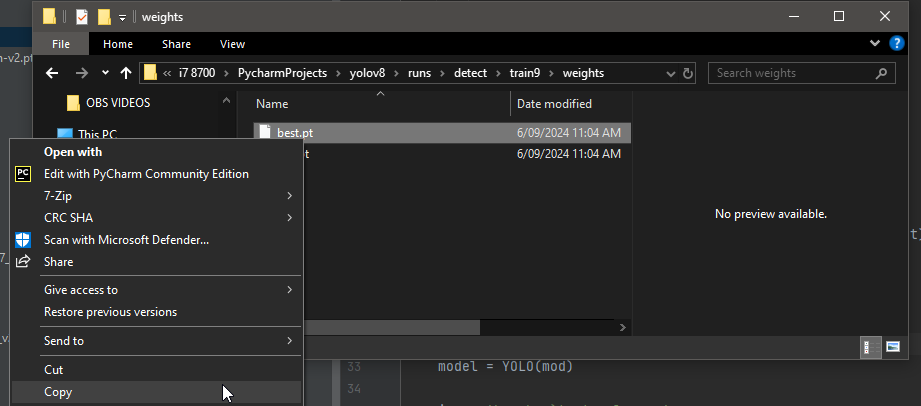
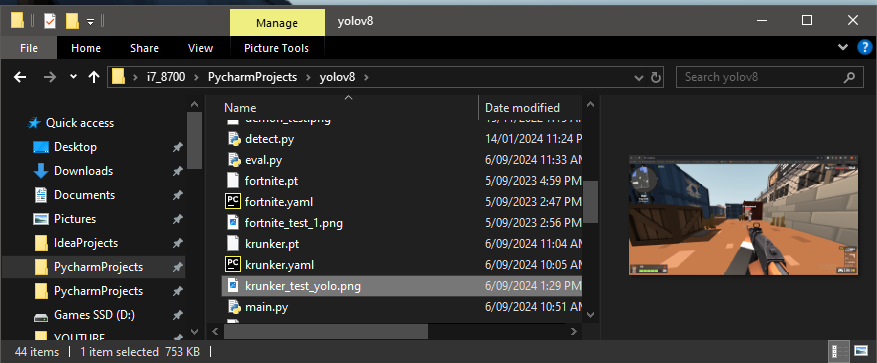
- Move the best.pt located in
runs/detect/train#/weightsfrom the trained Krunker Aimbot model into the parent folder for yolov8 and rename it tokrunker.pt
Next in gameplay for Krunker.io take a screenshot by pressing the printscreen key on the keyboard. either paste the screenshot in a image editor or paint and save as a png file then move it to the yolov8 project folder.
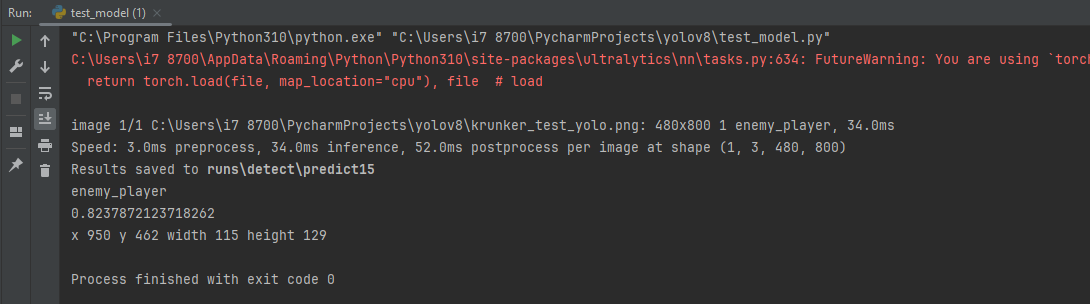
Create a file called test_model.py and code the following:
from ultralytics import YOLO
def custom_predict(sourc='screen', sav=True, sho=False,  imgs=(800,800), con=0.3, save_tx=False):

    predictions = model.predict(source=sourc, save=sav, show=sho,  imgsz=imgs, conf=con, save_txt=save_tx)  # save predictions as labels
    for result in predictions:
        detection_count = result.boxes.shape[0]
        for i in range(detection_count):
            cls = int(result.boxes.cls[i].item())
            name = result.names[cls]
            print(name)
            confidence = float(result.boxes.conf[i].item())
            print(confidence)
            bounding_box = result.boxes.xyxy[i].cpu().numpy()

            x = int(bounding_box[0])
            y = int(bounding_box[1])
            width = int(bounding_box[2] - x)
            height = int(bounding_box[3] - y)
            print("x", x, "y",y, "width",width, "height", height)

if __name__ == '__main__':
    # Load a pretrained YOLOv8n model
    mod = 'krunker.pt'
    model = YOLO(mod)
    img = 'krunker_test_yolo.png'
    custom_predict(sourc=img, sav=True, sho=True)
And here is the result:

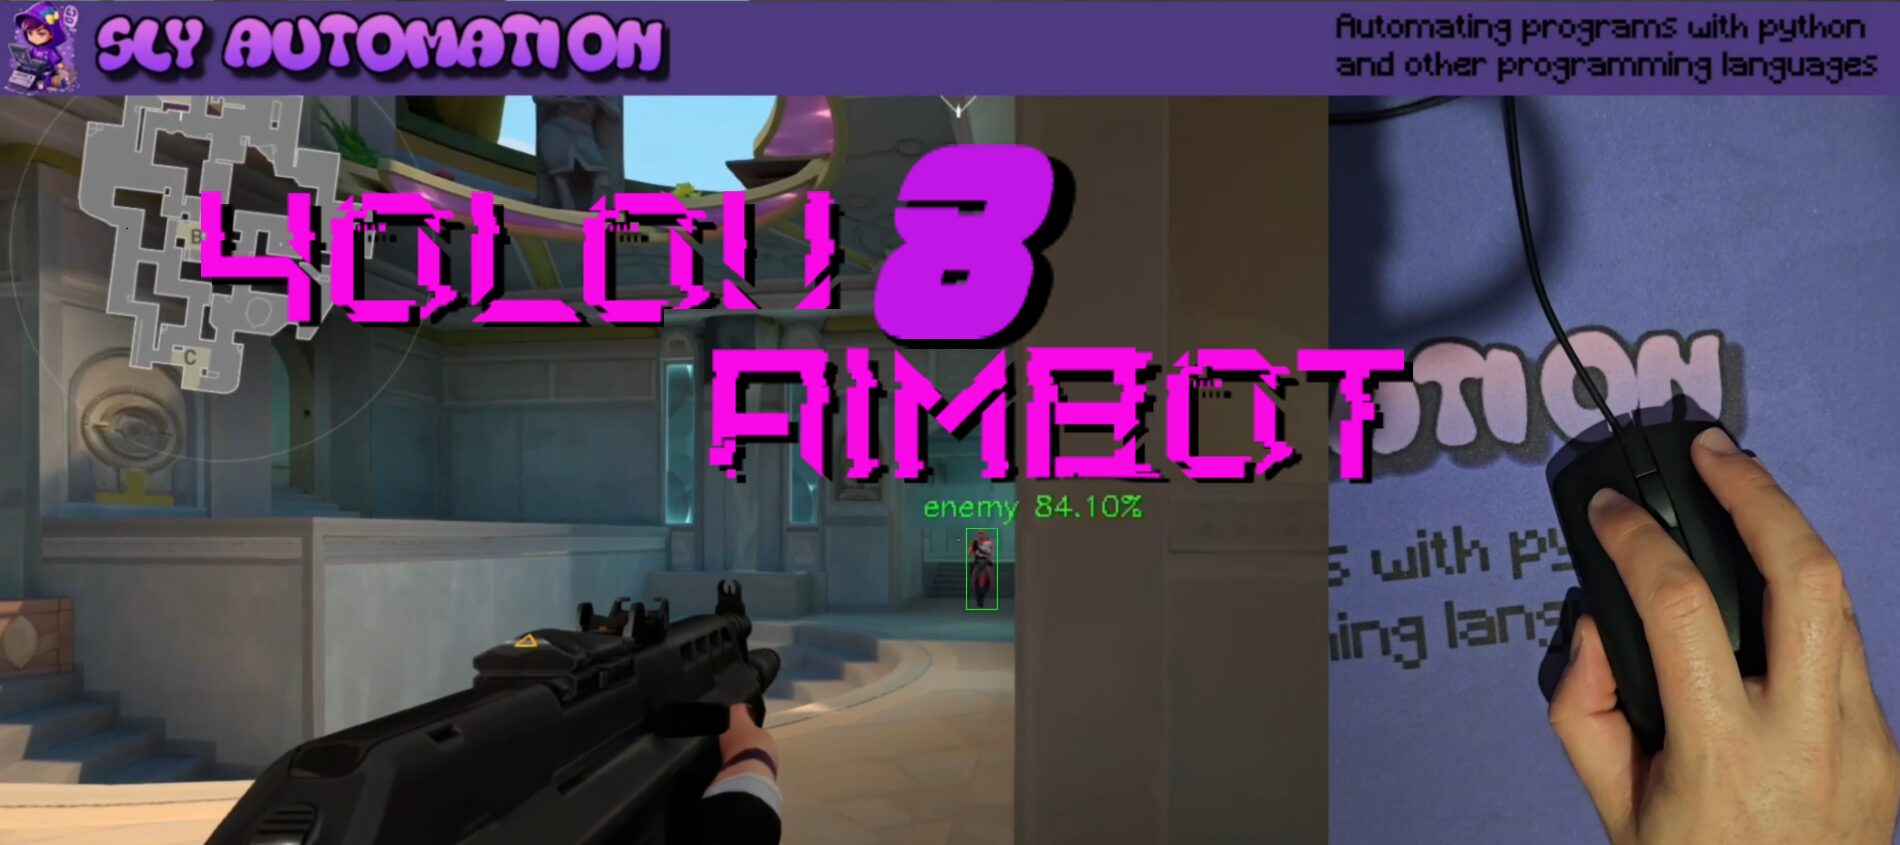
4.2 Testing Your Krunker Aimbot in Real Time
Deploy your aimbot by taking a screenshot while in play with an enemy visible on screen. Save the screenshot in the yolov8 directory. Create a new python file called test_model_stream.py:
import cv2
import numpy as np
from mss import mss
from ultralytics import YOLO


def custom_predict(sourc='screen', sav=True, sho=False,  imgs=(800,800), con=0.3, save_tx=False):
    predictions = model.predict(source=sourc, save=sav, show=sho,  imgsz=imgs, conf=con, save_txt=save_tx)  # save predictions as labels
    boxes_data = []
    for result in predictions:

        boxes = result.boxes
        for box in boxes:
            b = box.xyxy[0]  # get box coordinates in (left, top, right, bottom) format
            c = box.cls
            conf = box.conf[0]  # Get confidence score
            label = f"{model.names[int(c)]} {conf*100:.2f}%"
            boxes_data.append((b, label))
    return boxes_data

if __name__ == '__main__':
    # Load a pretrained YOLOv8n model
    osrs_monitor = {"top": 0, "left": 0, "width": 800, "height":800}
    monitor = {"top": 0, "left": 0, "width": 1920, "height": 1080}
    sct = mss()
    mod = 'krunker.pt'
    model = YOLO(mod)
    Bot = True
    while Bot:
        close_points = []
        img = np.array(sct.grab(monitor))
        img = cv2.cvtColor(img, cv2.COLOR_BGRA2BGR)
        bigger = cv2.resize(img, (800, 800))
        boxes_data= custom_predict(sourc=bigger, sav=False, sho=False)
        for box, label in boxes_data:
            # Rescale the bounding box back to the original image size
            box = [int(coord * 1920 / 800) if i % 2 == 0 else int(coord * 1080 / 800) for i, coord in enumerate(box)]
            start_point = (box[0], box[1])
            end_point = (box[2], box[3])

            # Calculate the center of the box
            center_x = round((box[0] + box[2]) / 2)
            height = box[3] - box[1]  # Calculate the height of the box
            center_y = round(box[1] + 0.1 * height)  # Adjust center_y to 90% of the height

            color = (0, 255, 0)
            thickness = 1
            img = cv2.rectangle(img, start_point, end_point, color, thickness)
            img = cv2.circle(img, (center_x, center_y), radius=2, color=(0, 0, 255), thickness=-1)
            img = cv2.putText(img, label, (box[0], box[1] - 10), cv2.FONT_HERSHEY_SIMPLEX, 0.5, color, thickness)
            close_points.append((center_x, center_y))
        cv2.imshow("images", img)
        cv2.waitKey(5)
This will be a quick test to ensure it detects targets correctly in Krunker.io. You can integrate it into your gameplay by capturing live video frames, running them through the YOLOv8 model, and later we’ll be coding and generating control inputs (e.g., moving the mouse to target enemies).
Conclusion and Next Steps
You’ve now successfully set up a YOLOv8 Krunker Aimbot, trained a custom Krunker Aimbot model, and deployed it for gaming on Krunker.io. As you continue, consider experimenting with different datasets, tweaking hyperparameters, or optimizing the inference speed for even better performance.
Stay tuned for more as the next guide will take the Krunker aimbot and add mouse movement and clicks to target and shoot enemies in Krunker.io!
For a guide on turning detection to mouse clicks and movement check out: YOLOv8 Aimbot code with mouse movement and clicks
One thought on “Krunker Aimbot with Yolov8 and Roboflow”