In Arduino programming, char array arduino are character arrays (or char array) and are used to store strings of characters. Unlike standard C++ strings, Arduino uses C-style strings, which are arrays of char terminated by a null character ('\0'). These arrays are useful for handling and manipulating text data in your Arduino sketches.
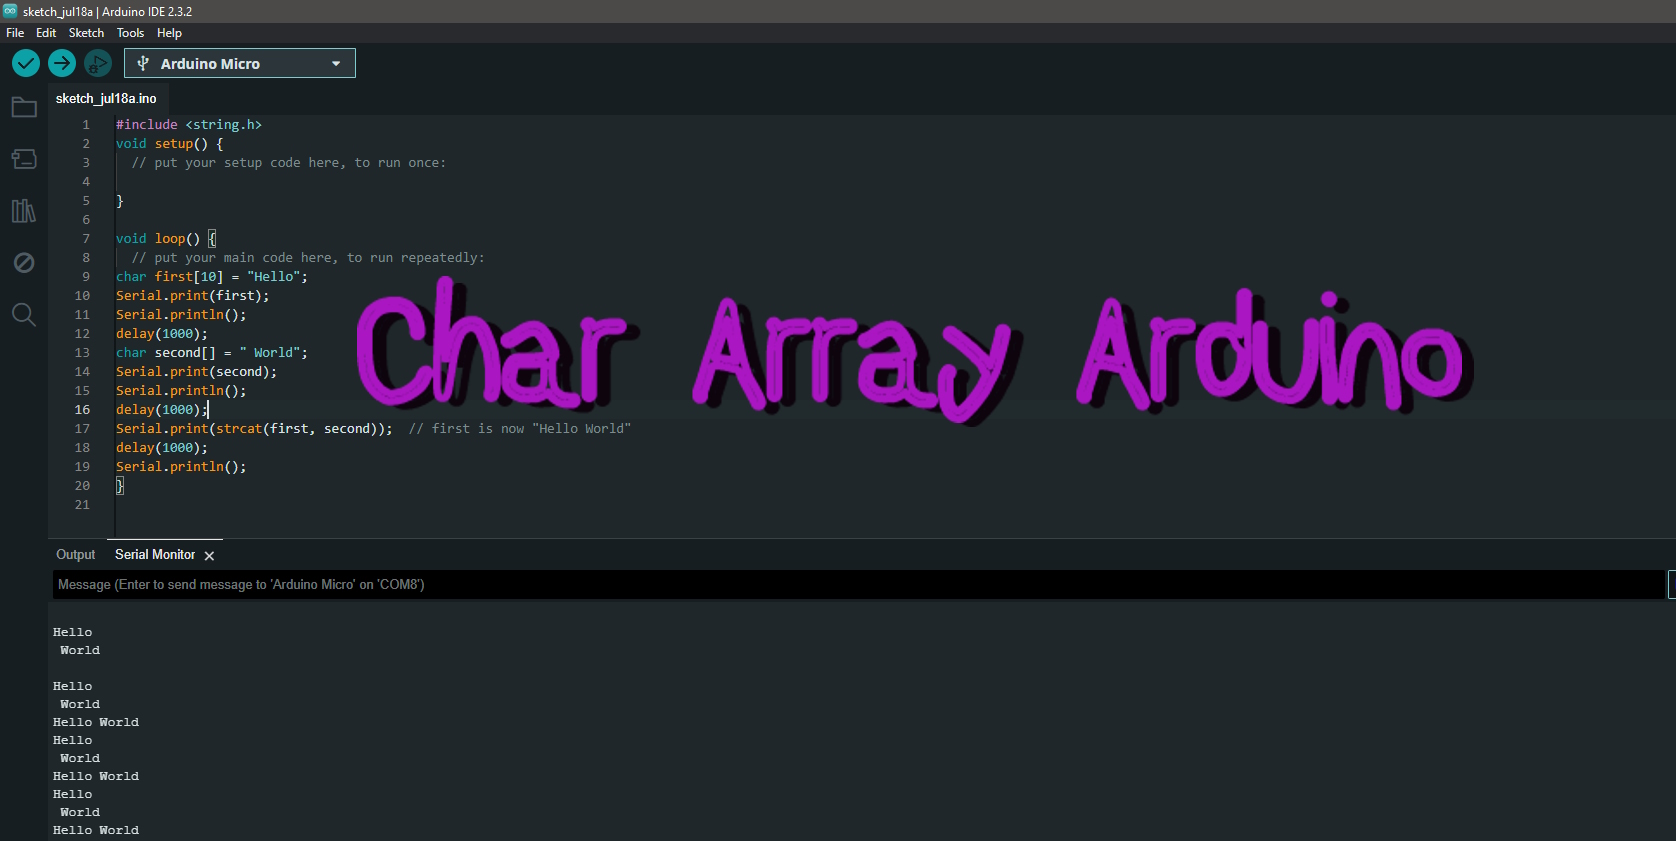
Demonstration Code:
#include <string.h>
void setup() {
  // put your setup code here, to run once:

}

void loop() {
  // put your main code here, to run repeatedly:
char first[10] = "Hello";
Serial.print(first);
Serial.println();
delay(1000);
char second[] = " World";
Serial.print(second);
Serial.println();
delay(1000);
Serial.print(strcat(first, second));  // first is now "Hello World"
delay(1000);
Serial.println();
}
Declaring a char Array
A char array can be declared in several ways:
Declaration with Fixed Size
You can declare a char array with a fixed size. If you know the maximum length of the string you need to store, this method is straightforward:
char myArray[10]; // Declare an array of 10 charactersInitialization with a String Literal
You can also initialize a char array with a string literal. The size of the array is automatically determined by the length of the string plus one for the null terminator:
char myArray[] = "Hello";This is equivalent to:
char myArray[6] = "Hello";Working with char Arrays
Accessing Elements
You can access individual characters in a char array arduino using their index:
char myArray[] = "Hello";
char firstChar = myArray[0];  // 'H'
char secondChar = myArray[1];  // 'e'
Modifying Elements
You can modify the elements of a char array arduino just like any other array:
char myArray[] = "Hello";
myArray[0] = 'J';  // Now myArray is "Jello"
Null-Terminated Strings
C-style strings are null-terminated. This means the last character is always '\0' (null character). This is crucial for functions that work with strings to know where the string ends.
char myArray[6] = {'H', 'e', 'l', 'l', 'o', '\0'};Common Operations with char Arrays arduino
Finding the Length of a char Array arduino
To find the length of a char array, use the strlen() function from the string.h library:
#include <string.h>

char myArray[] = "Hello";
int length = strlen(myArray);  // length is 5
Copying a char Array arduino
To copy one char array to another, use the strcpy() function:
#include <string.h>

char source[] = "Hello";
char destination[10];
strcpy(destination, source);  // destination is now "Hello"
Concatenating char Arrays arduino
To concatenate two char arrays, use the strcat() function:
#include <string.h>

char first[10] = "Hello";
char second[] = " World";
strcat(first, second);  // first is now "Hello World"
Example: Reading Serial Input into a char Array arduino
Here’s an example of how to read input from the Serial Monitor into a char array:
char inputBuffer[50];  // Buffer to store incoming data
int index = 0;  // Index to keep track of where to store the next character

void setup() {
    Serial.begin(9600);
}

void loop() {
    while (Serial.available() > 0) {
        char incomingByte = Serial.read();
        if (incomingByte == '\n') {
            inputBuffer[index] = '\0';  // Null-terminate the string
            Serial.print("You entered: ");
            Serial.println(inputBuffer);
            index = 0;  // Reset index for the next input
        } else {
            inputBuffer[index++] = incomingByte;
            if (index >= sizeof(inputBuffer) - 1) {
                index = sizeof(inputBuffer) - 1;
            }
        }
    }
}
Example: Parsing a char Array arduino
Suppose you want to parse a char array containing comma-separated values. You can use the strtok() function:
#include <string.h>
char data[] = "23,45,67";
char* token;
void setup() {
Serial.begin(9600);
// Get the first token
token = strtok(data, ",");
// Walk through other tokens
while (token != NULL) {
Serial.println(token);
token = strtok(NULL, ",");
}
}
void loop() {
// Nothing to do here
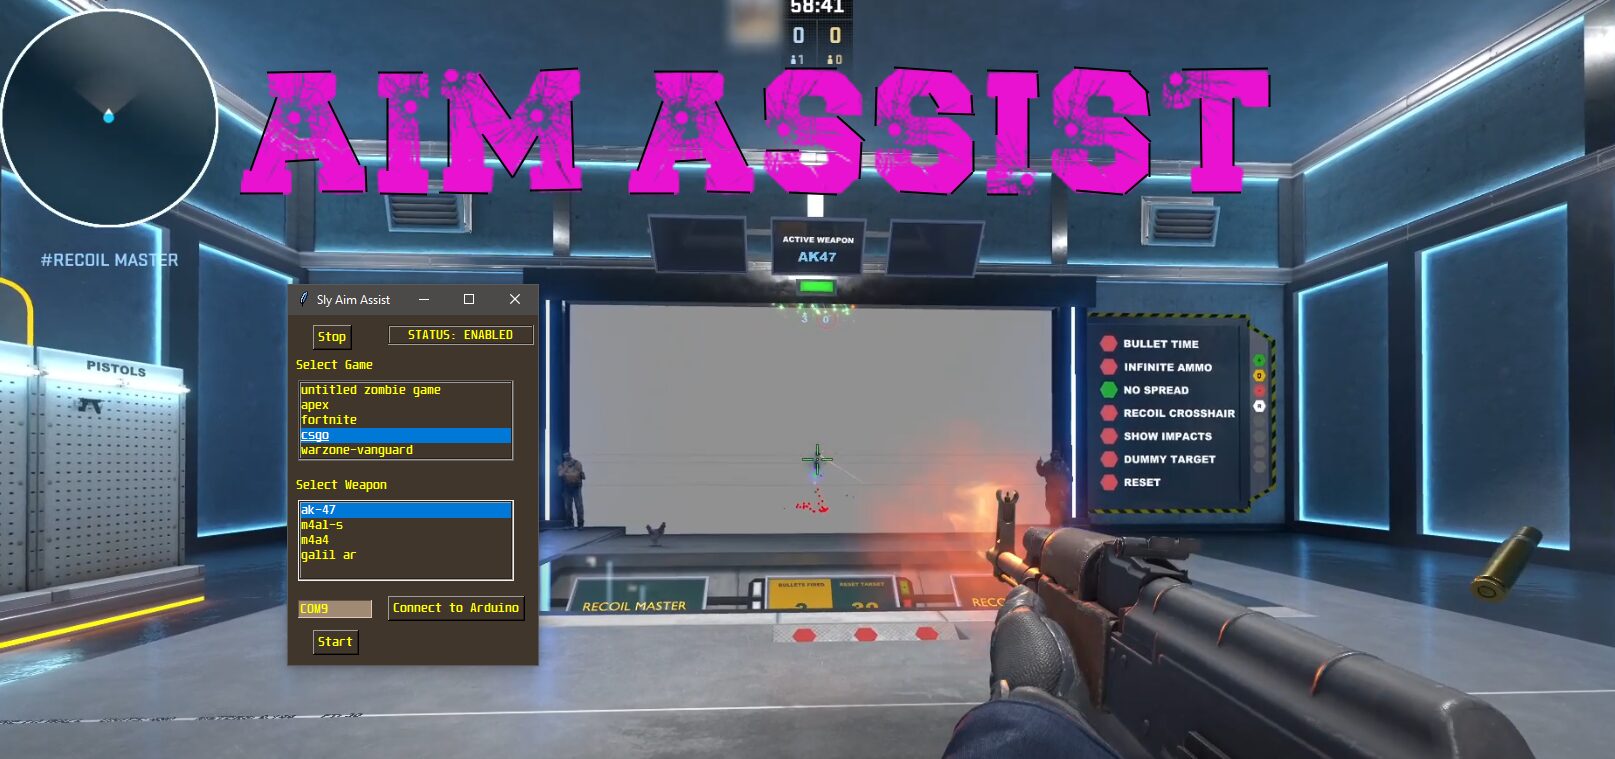
}In the example below i use char array arduino for the color aimbot code. This is because char arrays use less memory than other variable types so the code can run as efficiently as possible, check it out here: Valorant Aimbot with color detection with python and arduino.
#include <Mouse.h>
#include <usbhub.h>
USB     Usb;
USBHub     Hub(&Usb);
int dx;
int dy;
int lmb;
int rmb;
int mmb;
#include <hidboot.h>
HIDBoot<USB_HID_PROTOCOL_MOUSE>    HidMouse(&Usb);
class MouseRptParser : public MouseReportParser
{
  protected:
    void OnMouseMove  (MOUSEINFO *mi);
    void OnLeftButtonUp (MOUSEINFO *mi);
    void OnLeftButtonDown (MOUSEINFO *mi);
    void OnRightButtonUp  (MOUSEINFO *mi);
    void OnRightButtonDown  (MOUSEINFO *mi);
    void OnMiddleButtonUp (MOUSEINFO *mi);
    void OnMiddleButtonDown (MOUSEINFO *mi);
};
void MouseRptParser::OnMouseMove(MOUSEINFO *mi)
{
  dx = mi->dX;
  dy = mi->dY;
};
void MouseRptParser::OnLeftButtonUp (MOUSEINFO *mi)
{
  lmb = 0;
};
void MouseRptParser::OnLeftButtonDown (MOUSEINFO *mi)
{
  lmb = 1;
};
void MouseRptParser::OnRightButtonUp  (MOUSEINFO *mi)
{
  rmb = 0;
};
void MouseRptParser::OnRightButtonDown  (MOUSEINFO *mi)
{
  rmb = 1;
};
void MouseRptParser::OnMiddleButtonUp (MOUSEINFO *mi)
{
  mmb = 0;
};
void MouseRptParser::OnMiddleButtonDown (MOUSEINFO *mi)
{
  mmb = 1;
};
MouseRptParser  Prs;

void setup() {
  Serial.begin(1000000);
  Serial.setTimeout(1);
  // pinMode(buttonPin, INPUT);  // Set the button as an input
  // digitalWrite(buttonPin, HIGH);  // Pull the button high
  // delay(1000);  // short delay to let outputs settle
  Mouse.begin(); //Init mouse emulation
  Usb.Init();
  HidMouse.SetReportParser(0, &Prs);
}

void loop() {
  if (Serial.available() > 0) {
    String input = Serial.readStringUntil('\n'); // Read the serial input until newline character
    input.trim(); // Remove leading and trailing spaces
    //Serial.println(input);
    // Check if the input is a valid format
    if (input == "left") {
        Mouse.click(MOUSE_LEFT);
      }
      if (input == "right") {
        Mouse.click(MOUSE_RIGHT);
      }
      else
      {
    //if (input.startsWith("[") && input.endsWith("]")) {
      input.remove(0, 1); // Remove the leading '['
      input.remove(input.length() - 1); // Remove the trailing ']'
      //Serial.println(input);
      char charArray[input.length() + 1];

      input.toCharArray(charArray, sizeof(charArray));
      //Serial.println("char array");
      //Serial.println(charArray);
      char* pair = strtok(charArray, ", ");
      //Serial.println(pair);
      while (pair != NULL) {
        String pairStr = pair;
        //Serial.println(pair);
        //pairStr.trim();
        pairStr.remove(0, 1); // Remove the leading '('
        pairStr.remove(pairStr.length() - 1); // Remove the trailing ')'

        int commaIndex = pairStr.indexOf(":");
        if (commaIndex != -1) {
          String xStr = pairStr.substring(0, commaIndex);
          String yStr = pairStr.substring(commaIndex + 1);

          int x = xStr.toInt();
          int y = yStr.toInt();
          //Serial.println(x);
          //Serial.println(y);
          float lim = (float)1 + ((float)100/(float)254);
          //Serial.println(lim);
          // Move the mouse to the specified coordinates
          int finx = round((float)x * (float)lim); // adjust for 127 limitation of arduino
          int finy = round((float)y * (float)lim); // adjust for 127 limitation of arduino
          //Serial.println(finx);
          //Serial.println(finy);
          Mouse.move(finx, finy, 0);

          //delay(1); // Add a delay to prevent rapid movements
        }

        pair = strtok(NULL, ", ");
      }
    }
  }
  Serial.flush();
  Usb.Task();
  Mouse.move(dx ,dy);

  dx = 0;
  dy= 0;
  if (lmb == 1) {
    Mouse.press(MOUSE_LEFT);
    }
  if (lmb == 0) {
    Mouse.release(MOUSE_LEFT);
    }
  if (rmb == 1) {
    Mouse.press(MOUSE_RIGHT);
    }
  if (rmb == 0) {
    Mouse.release(MOUSE_RIGHT);
    }
  if (mmb == 1) {
    Mouse.press(MOUSE_MIDDLE);
    }
  if (mmb == 0) {
    Mouse.release(MOUSE_MIDDLE);
    }

  }
Conclusion
Using char arrays in Arduino is essential for handling text data. By understanding how to declare, initialize, and manipulate these arrays, you can effectively manage strings in your Arduino projects. This guide provides a comprehensive overview of the basics and some practical examples to help you get started with char arrays on Arduino. Here’s the official documentation on arduino.cc: Arrays
Looking for guides on:
Official Arduino Store: Visit the official Arduino online store for authentic Arduino Leonardo boards. Check their website for availability.
Online Retailers:
- Aliexpress: Aliexpress offers generic Arduino boards, such as the:
| Item | Image | Cost ($USD) |
| Leonardo R3 Development Board + USB Cable ATMEGA32U4 |  | $5.72 |
| Arduino USB Host Shield |  | $5.31 |
| Arduino Leonardo R3 | | $5.72 |
| Arduino UNO R3 Development Board |  | $7.36 |
| Arduino Starter Kit |  | $29.98 |
| Soldering Iron Kit |  | $18.54 |
| Arduino Sensor Kit |  | $17.18 |