Meet the roblox auto clicker script, are you tired of endless clicking in Roblox games? an essential tool for Roblox enthusiasts looking to streamline gameplay. Developed by Slyautomation specifically for Roblox gamers, this software automates repetitive tasks, letting you progress faster and enjoy the game hassle-free.
Want to skip to view the video of the roblox auto clicker script? Click Here!
You can download the roblox auto clicker script Here: auto clicker for roblox
This guide will show you how to create your own roblox auto clicker script so you can learn coding, dominate in game and also know what’s in it (no malware and no viruses)!
We will use python and IDLE real easy to use and to start with. If you haven’t already installed python and IDLE check out: Python IDLE: A Comprehensive Guide for Beginners
Is auto clicker bannable in roblox?
Roblox has not made through any official channels that auto clickers, FPS unlockers, and texture packs/shaders are not allowed, then it’s reasonable to assume that their usage is permitted within the bounds of the platform’s rules. Some games within roblox state no autoclicking but is not enforceable through the roblox app and is up to the moderators to perform kicking/banning of users on their owned games.
What’s the roblox auto clicker script?
The roblox auto clicker script simplifies repetitive clicking tasks in Roblox games, allowing players to automate object clicks effortlessly. Perfect for games like:
- Backrooms Race Clicker
- Bubble Gum Clicker
- Mining Clicker Simulator
- Skydive Race Clicker
- Doors Race Clicker
- Anime Race Clicker
- Race Clicker
- Clicker Simulator
- Tapper Simulator
And many more! This tool optimizes gameplay, saving time and effort for players.
Features of roblox auto clicker script
- Customizable Clicking Speed: Tailor the clicking speed to match game requirements, whether faster or slower.
- User-Friendly Interface: Simple and intuitive design for easy navigation, even for beginners.
- Safe and Secure: Virus and malware-free software ensuring utmost computer safety.
- Free to Use: Enjoy the benefits without spending a dime.
Benefits of Using roblox auto clicker script
- Time Saver: Automate repetitive tasks and utilize saved time for other game aspects.
- Reduced Fatigue: Avoid physical strain from constant clicking, maintaining energy for gameplay.
- Enhanced Performance: Optimize task efficiency for improved overall game performance.
- Customization Options: Configure clicking settings for various screen locations and tasks.
Making the roblox auto clicker script
Utilizing the roblox auto clicker script is a breeze, even for newcomers.
- Install the python modules using CMD: Open CMD from your computer’s applications or by searching for “IDLE” in the Start menu (on Windows) or using the terminal (on macOS/Linux) type the following:
pip install pyautogui keyboard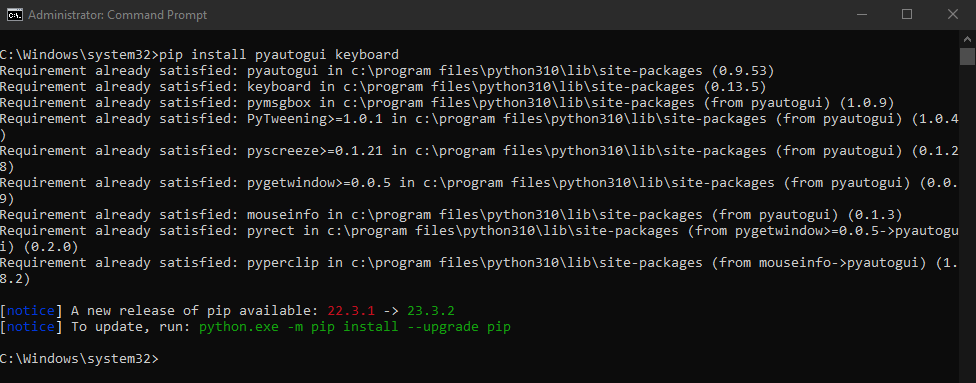
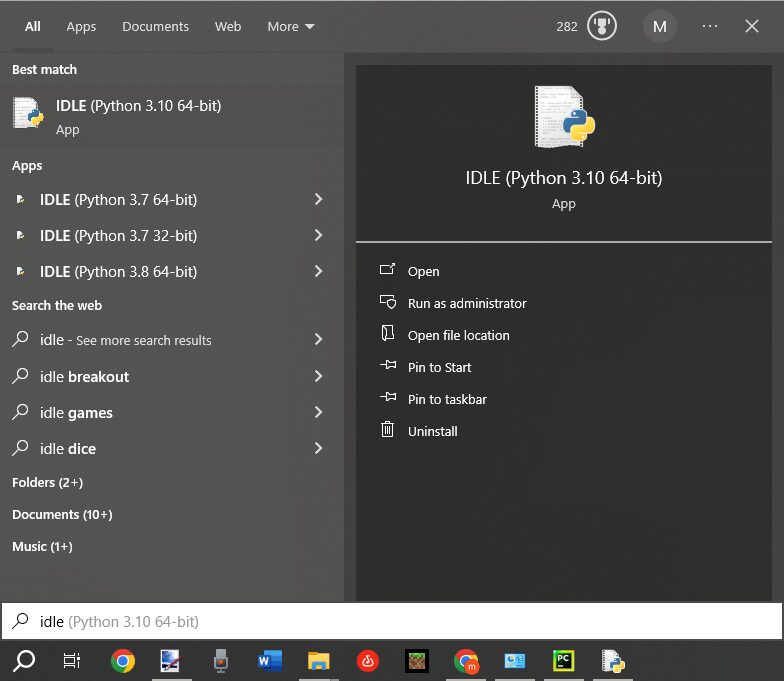
- Open IDLE: Open IDLE from your computer’s applications or by searching for “IDLE” in the Start menu (on Windows) or using the terminal (on macOS/Linux).
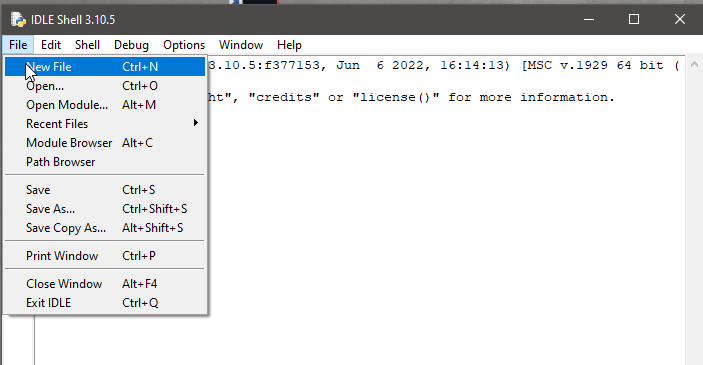
- Create a New File: Click on “File” in the menu bar and select “New File” to open a new editing window within IDLE.
- Write the Code: Copy and paste the following code into the new file in the IDLE editor:
The roblox auto clicker script code
import tkinter
from tkinter import *
import time
import threading
import pyautogui
import keyboard

root = Tk()
root.title("Roblox Autoclicker")
clicking_speed = 0.1
toggle_button = 'num lock'
status = "DISABLED"

WIDTH, HEIGHT = 300, 200
root.geometry('{}x{}'.format(WIDTH, HEIGHT))

status_label = tkinter.Label(root, text="STATUS: " + status)
status_label.pack()

speed_label = tkinter.Label(root, text="Clicking Speed:")
speed_label.pack()
speed_scale = tkinter.Scale(root, from_=0.1, to=1.0, resolution=0.1, orient=tkinter.HORIZONTAL, variable=clicking_speed, label="Speed")
speed_scale.pack()

start_button = tkinter.Button(root, text="Start Autoclicker", command=lambda: threading.Thread(target=start_autoclicker).start())
start_button.pack()

stop_button = tkinter.Button(root, text="Stop Autoclicker", command=lambda: threading.Thread(target=stop_autoclicker).start())
stop_button.pack()

def click_mouse():
    global autoclicking, clicking_speed, status
    last_state = False
    while autoclicking:
        key_down = keyboard.is_pressed(toggle_button)

        if key_down != last_state:
            last_state = key_down
            if last_state:
                stop_autoclicker()


        pyautogui.click()
        time.sleep(clicking_speed)

def start_autoclicker():
    global autoclicking, clicking_speed, speed_scale
    status_label.config(text="STATUS: 3")
    time.sleep(1)
    status_label.config(text="STATUS: 2")
    time.sleep(1)
    status_label.config(text="STATUS: 1")
    time.sleep(1)
    status_label.config(text="STATUS: ON")
    clicking_speed = speed_scale.get()
    autoclicking = True
    print(speed_scale.get())
    print(clicking_speed)
    click_mouse()

def stop_autoclicker():
    global autoclicking
    autoclicking = False
    status_label.config(text="STATUS: OFF")

def read_status():
    global status


root.mainloop()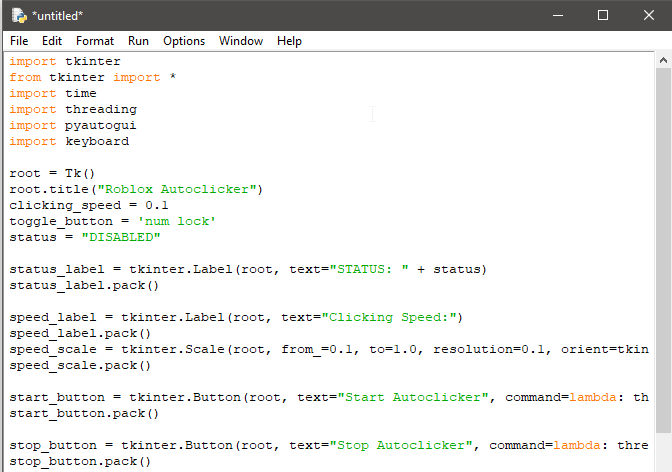
This Python script utilizes various libraries such as tkinter, time, threading, pyautogui, and keyboard to facilitate GUI creation, manage time intervals, execute parallel tasks, simulate mouse clicks, and detect keyboard inputs.
- Importing Libraries: The script begins by importing necessary libraries like
tkinter,time,threading,pyautogui, andkeyboard. - Initializing the GUI: Using
tkinter, a graphical user interface is established. Labels, buttons, and a slider (Scale) are created to control the autoclicker’s settings, such as clicking speed and activation/deactivation buttons. - Autoclicker Functions: Key functions like
click_mouse(),start_autoclicker(), andstop_autoclicker()manage the autoclicking functionality.click_mouse()performs the automated clicking task,start_autoclicker()initiates autoclicking, andstop_autoclicker()halts the autoclicker. - Status Monitoring: The GUI includes a status label that dynamically updates to reflect the current state of the autoclicker, indicating whether it’s active or inactive.
lambda:Construct in Python is used to create a small anonymous function (also known as a lambda function) inline. In the context of GUI programming, such as withtkinterin this case, it’s often used to pass arguments to functions triggered by events like button clicks.threading.Thread(target=start_autoclicker)This part creates aThreadobject from thethreadingmodule. It’s designed to run thestart_autoclickerfunction in a separate thread when triggered by the button click. Thetargetparameter specifies the function that the thread should execute..start()This method call is chained to theThreadobject, specifically to start the thread’s execution. It initiates thestart_autoclickerfunction in a new thread when the button is clicked.
Customization and Optimization for Roblox Gaming
This roblox auto clicker script offers several customization options:
- Clicking Speed Control: Users can adjust the clicking speed using a slider to suit the specific gameplay requirements in Roblox. This feature ensures precise control over the autoclicker’s performance.
- Activation Toggle: The autoclicker can be toggled off using a designated keyboard button (
toggle_button). This feature provides flexibility in deactivating the autoclicker swiftly during gameplay.
Running the roblox auto clicker script
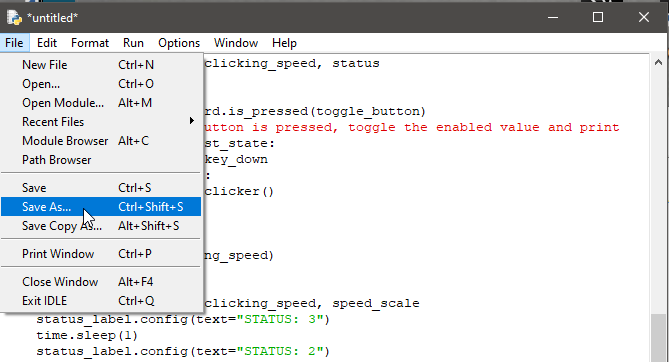
- Save the File: Click on “File” and then select “Save As”. Choose a file name (e.g.,
autoclicker.py) and save it in a location where you can easily access it.
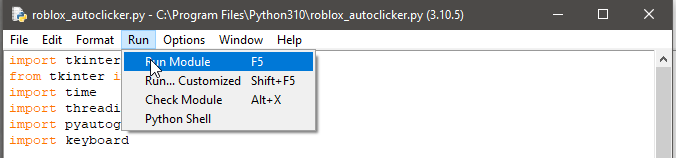
- Run the Code: Go to the “Run” menu and select “Run Module” or press
F5. This will execute the script, and a new window with the GUI for the auto clicker for roblox should appear.
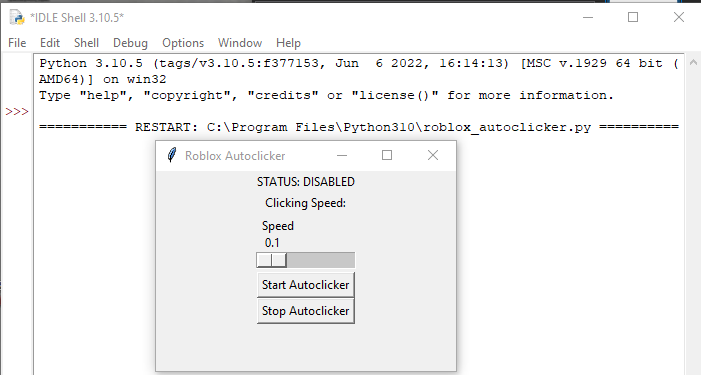
This code will create a GUI window with buttons and controls for the autoclicker. The Start Autoclicker button will initiate the autoclicking functionality, while the Stop Autoclicker button will halt it or pressing the num lock key on your keyboard. Adjust the clicking speed using the slider control provided.
Using the roblox auto clicker script in game!
Here’s an example of using the code in Bubble Gum Clicker in roblox!
Enhance your gaming experience with roblox auto clicker script: a safe, user-friendly, and free tool designed to make gameplay smoother and more enjoyable. Whether you’re a seasoned player or new to Roblox, this software is a must-have for faster progress and optimized gaming.
Like this tutorial check out this autoclicker! Step-by-Step Coding Tutorial: Creating an Auto Clicker to Dominate Magic Tiles!
Here are some more autoclicker projects! 🤯
🎮 Easy Autoclicker Bot Project using Python IDLE with PyAutoGUI 👨💻 🦾
Aliexpress Roblox Items
| Item | Image | Cost ($USD) |
| Roblox kid T-shirt |  | $4.30 |
| Roblox Backpack Satchel Pen Bag |  | $13.15 |
| 50pcs ROBLOX Stickers |  | $2.38 |